Using Smart Track for live location monitoring tracking and alerts
Smart Track
Smart Track provides you with a tracking and alert system. It performs tracking which is based on a GPS ping email interface and the optional intercept monitoring interface (i-case). Smart Track allows you to monitor a mobile phone's or a vehicle's movement and alerts you when certain conditions occur. OSS-ESPA automatically imports live location monitoring tracking events provided by the phone operators and license plate reader providers, and location information from social media locations. This type of event is generated periodically, for example every 5 to 15 minutes. For the optional electronic surveillance, the support is done via a live collection function interface with the operator. Smart Track also generates alerts for other conditions such as a phone being switched off.
On the main menu click View cases. The screen that opens depends on your setting of View cases. If it is set to:
Advanced view, then the Advanced view cases screen opens.
If your case is listed on the Favorite & recent cases tab, click the case name to open the Manage case screen.
If it is not listed on the Favorite & recent cases tab, then click the Cases tab. Use the search filters to help locate your case. You can also click to open the FILTERS group which allows you to set your own default filter defining what is displayed on this tab, for example you may wish to set it to cases that you created which are currently open.
If your case is listed under My recent cases click it to open the Manage case screen.
If it is not listed under My recent cases then select your case from the table, using the search filters to help locate it if required. Note, by default the search is set to only display cases that you created; if you are not the original creator but an assignee then ensure you set Case filter to Assigned cases before clicking Search.
Tree view, then the View i-cases screen opens.
Click at the top-right of the screen to open either the View Cases or Advanced view cases screen and follow the above description.
Firstly configure the phone, vehicle or account for live location monitoring, to do this:
On the Manage case screen, in the People and devices section click the name of the person you want to configure live location monitoring on.
The People and devices screen opens.
If you are performing live location monitoring on their phone then:
Click to display Phone numbers.
Click for the phone number of interest, then from the menu select Smart Track.
Note, by default Smart Track is only supported when the phone's normal operator supports Smart Track. If you want to use Smart Track on roaming operators then click , then from the menu select Edit phone, then select the required operators in Roaming operators.
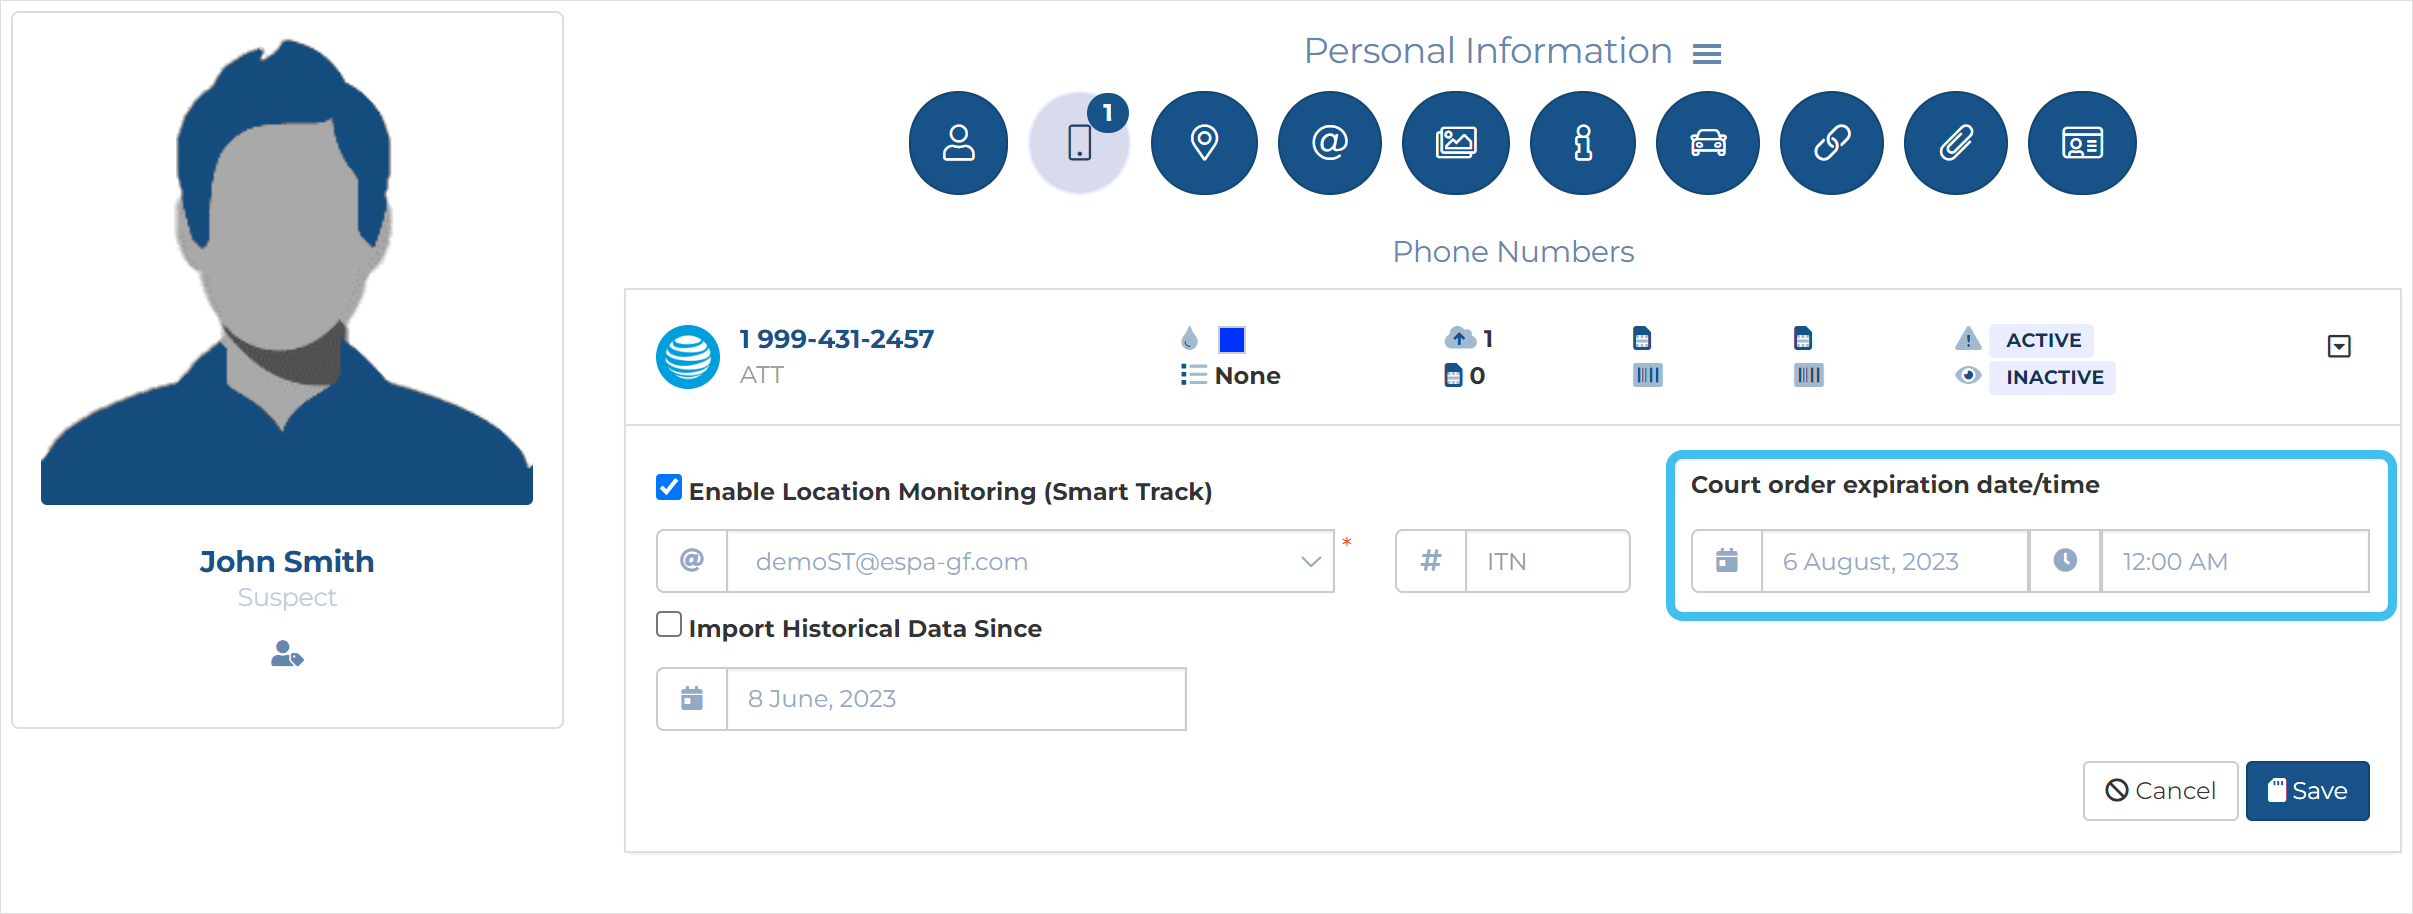
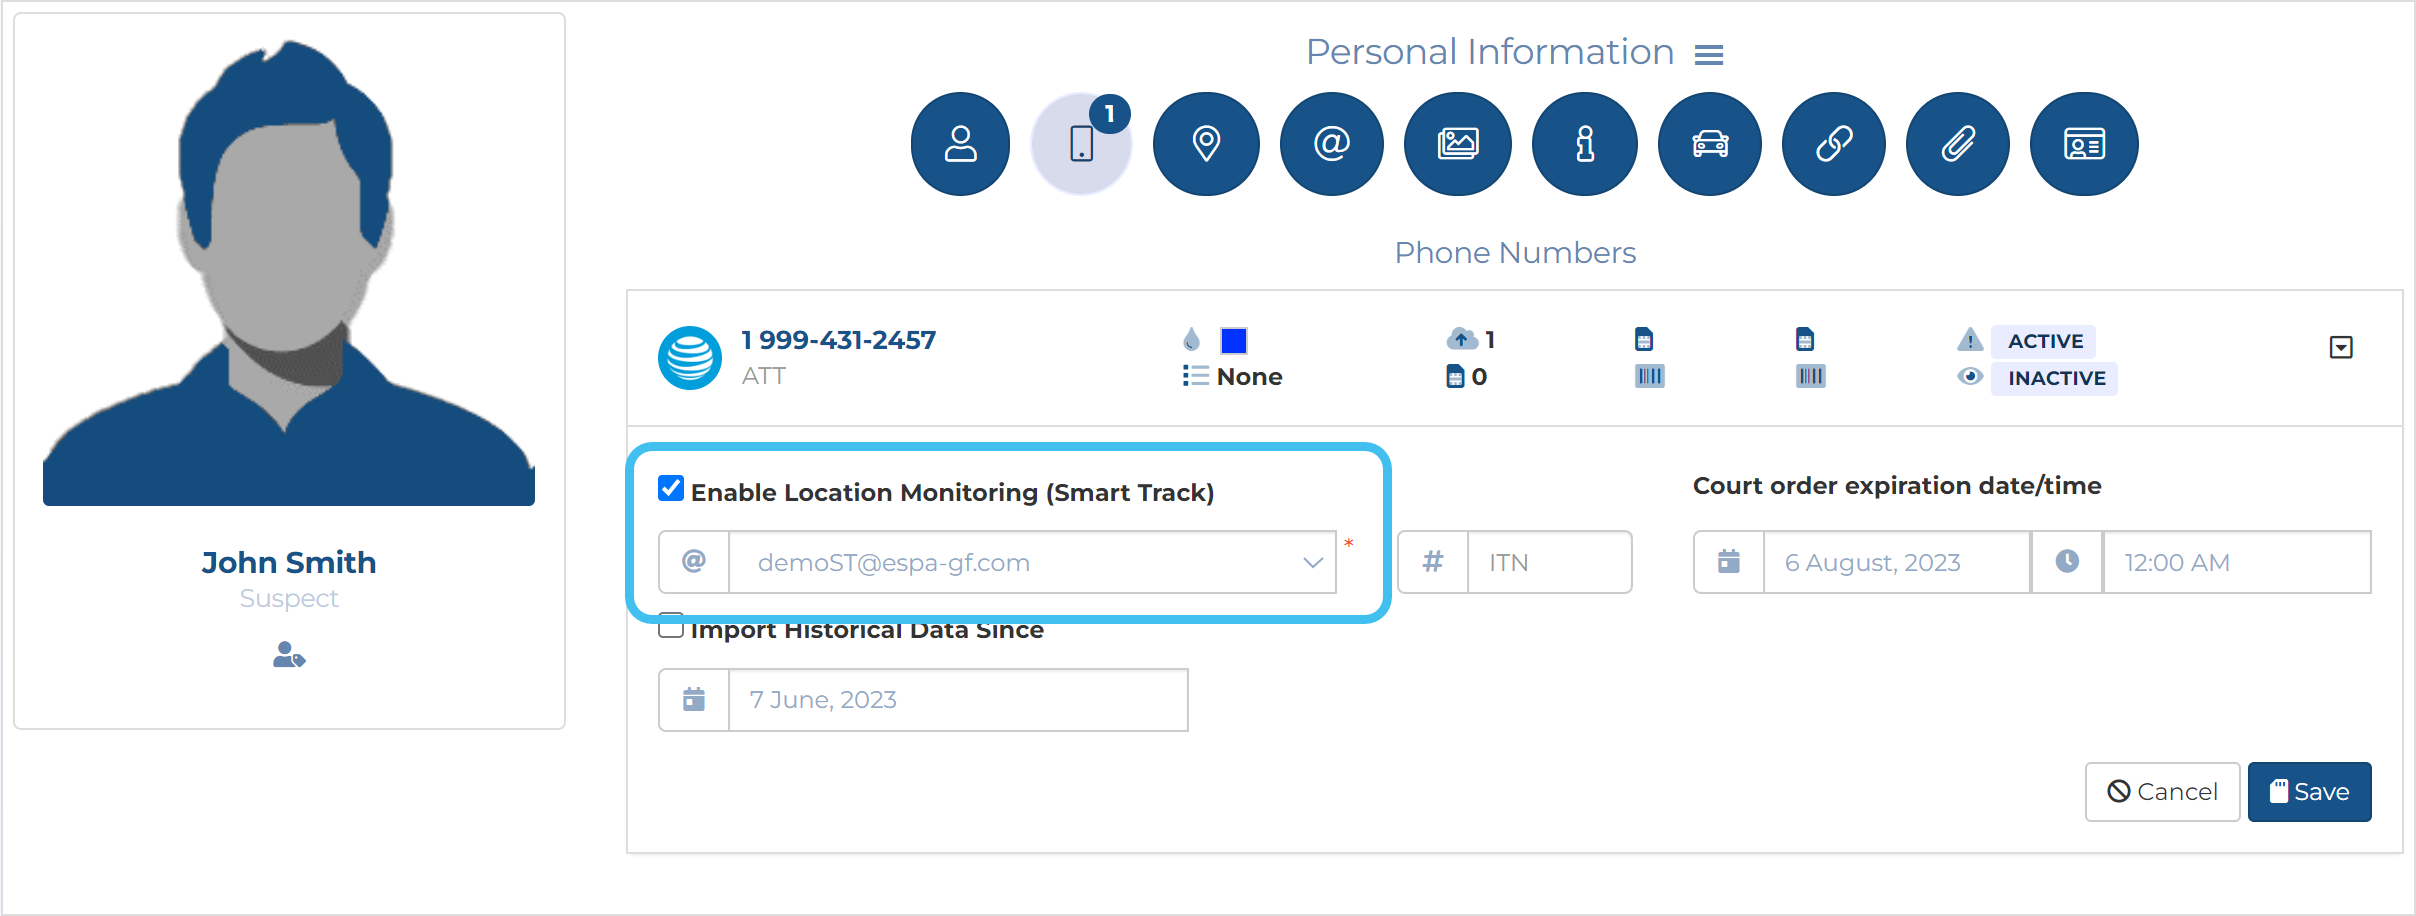
Ensure Enable location monitoring (Smart Track) is selected.
In Import from ensure the correct email is selected, often this is defined by your administrator. If the operator is:
Sprint or Verizon then in Case ID ensure the Case ID supplied by them for this phone number is entered.
ATT then in ITN enter the ITN supplied by ATT for this phone number is entered.
You can also enter any Roaming <operator> code that is requested so that when the phone is not on its normal network, you can still receive GPS pings. Note, you must also send a warrant to the roaming operators to receive the data and any required code.
If you are performing live location monitoring on a vehicle then:
Click to display the Vehicles tab. Note, if is not displayed, click , then select Vehicles.
Click for the vehicle of interest, then from the menu select Smart track.
Ensure Enable location monitoring (Smart Track) is selected.
In Import from ensure the correct email is selected, often this is defined by your administrator.
If the vehicle is a Ford and has a code that allows the vehicle to be tracked, then enter it in Code.
If you are performing live location monitoring on an account then:
Click to display the Accounts tab. Note, if is not displayed, click , then select Accounts.
Click for the account of interest, then from the menu select Smart track.
Ensure Enable location monitoring (Smart Track) is selected.
In Import from ensure the correct email is selected, often this is defined by your administrator.
On the Manage case screen click New alert.
The Add Smart Track alerts & notifications screen opens.
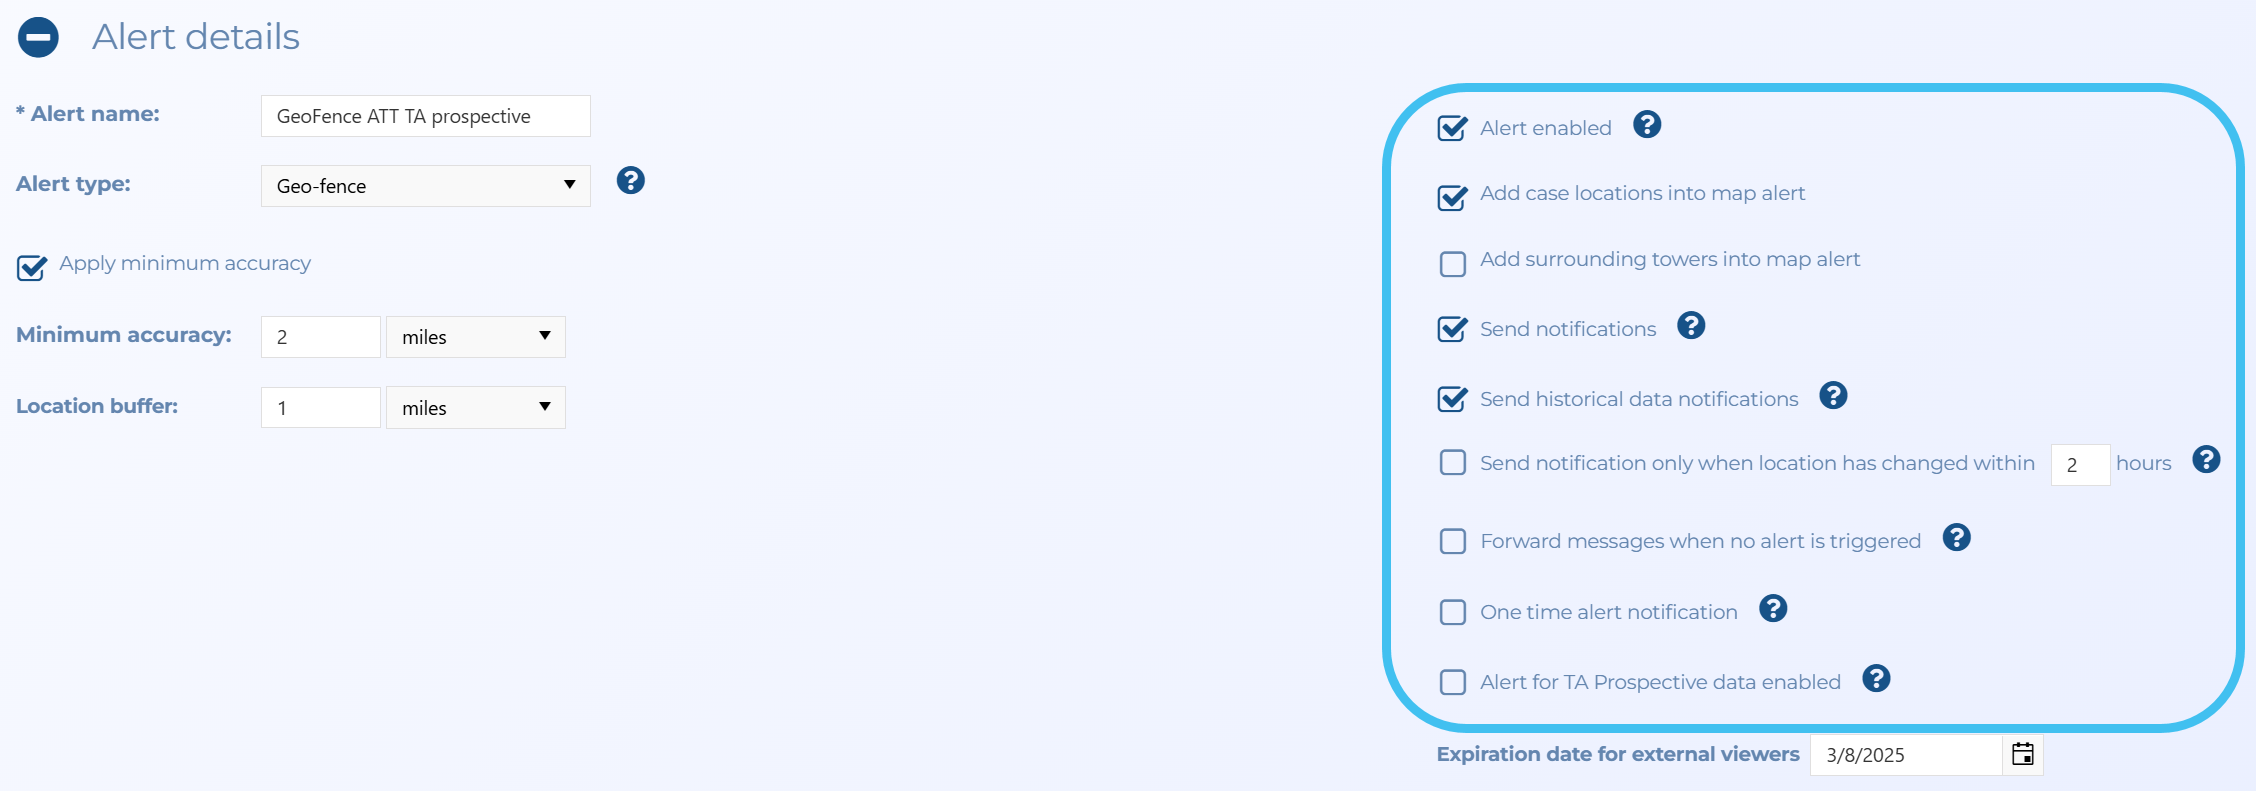
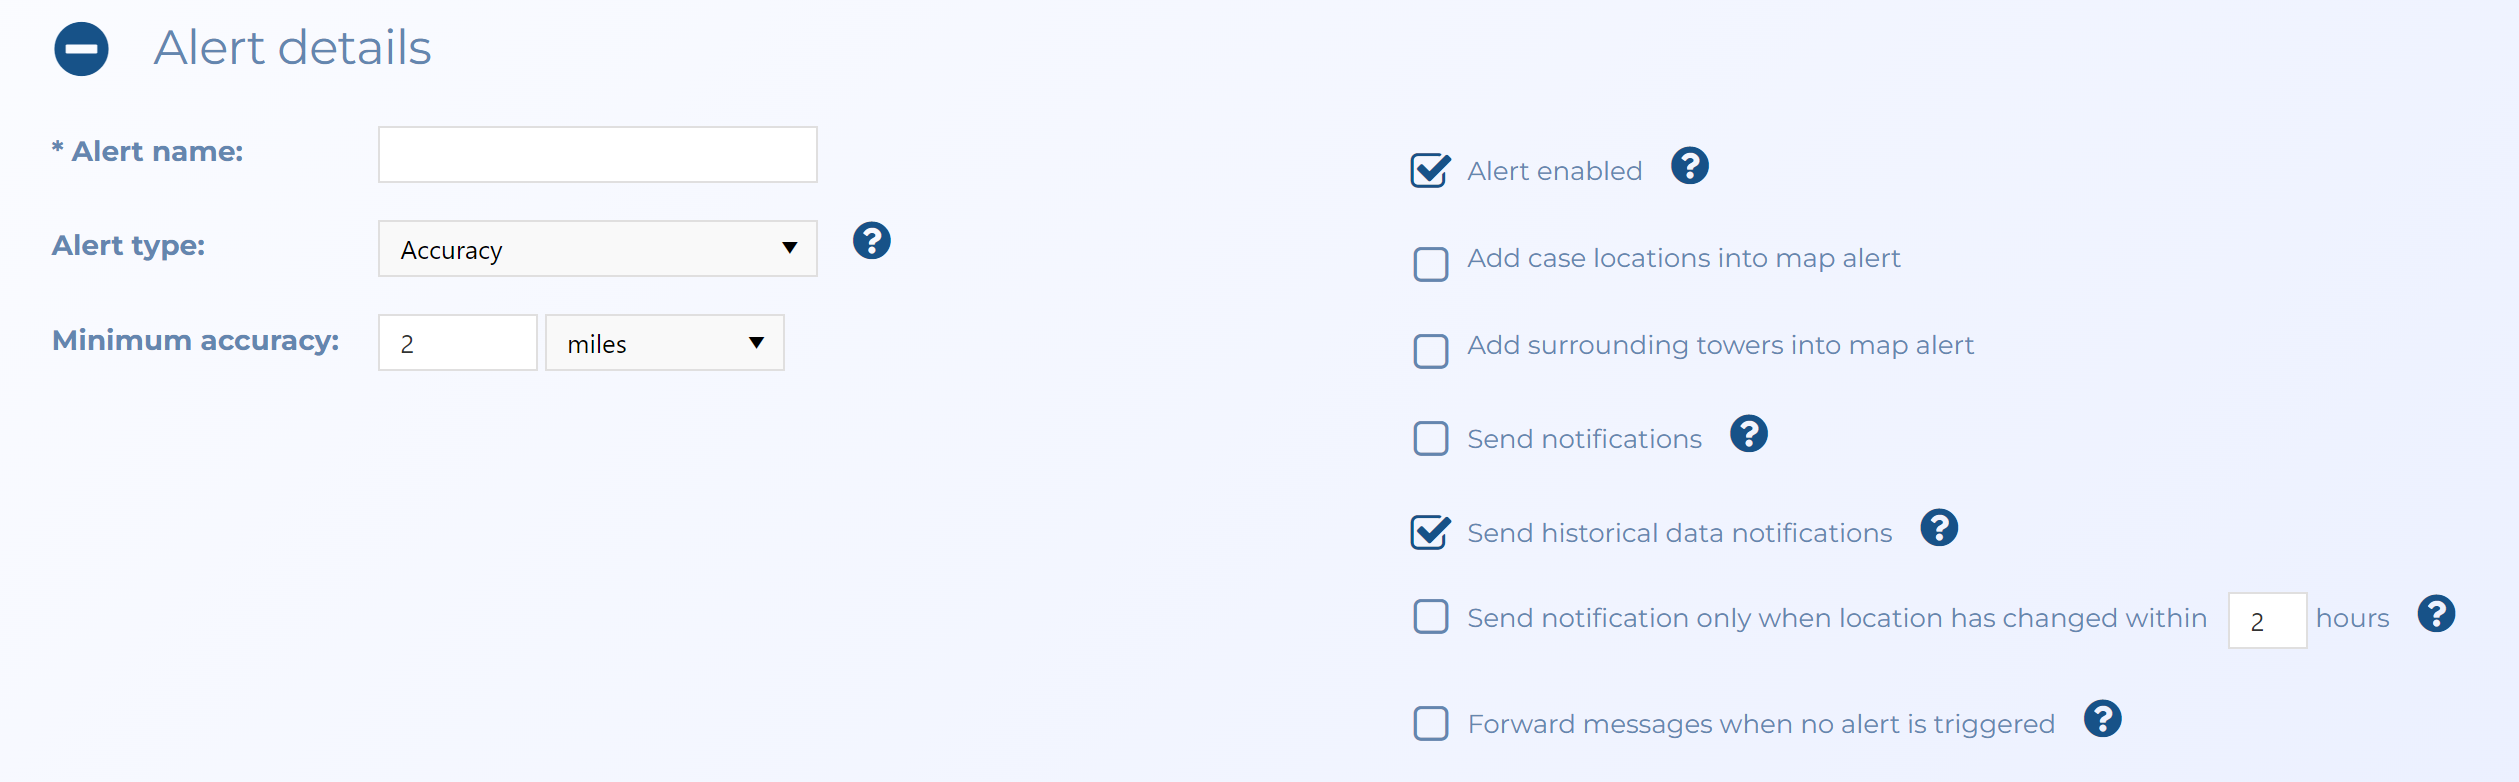
In Alert name enter a name for the alert. It is useful to enter a name that gives you a clear indication of what the alert is for, for example, "Fred Higgs away from home", "Smith near victim's home" or "Suspects meeting".
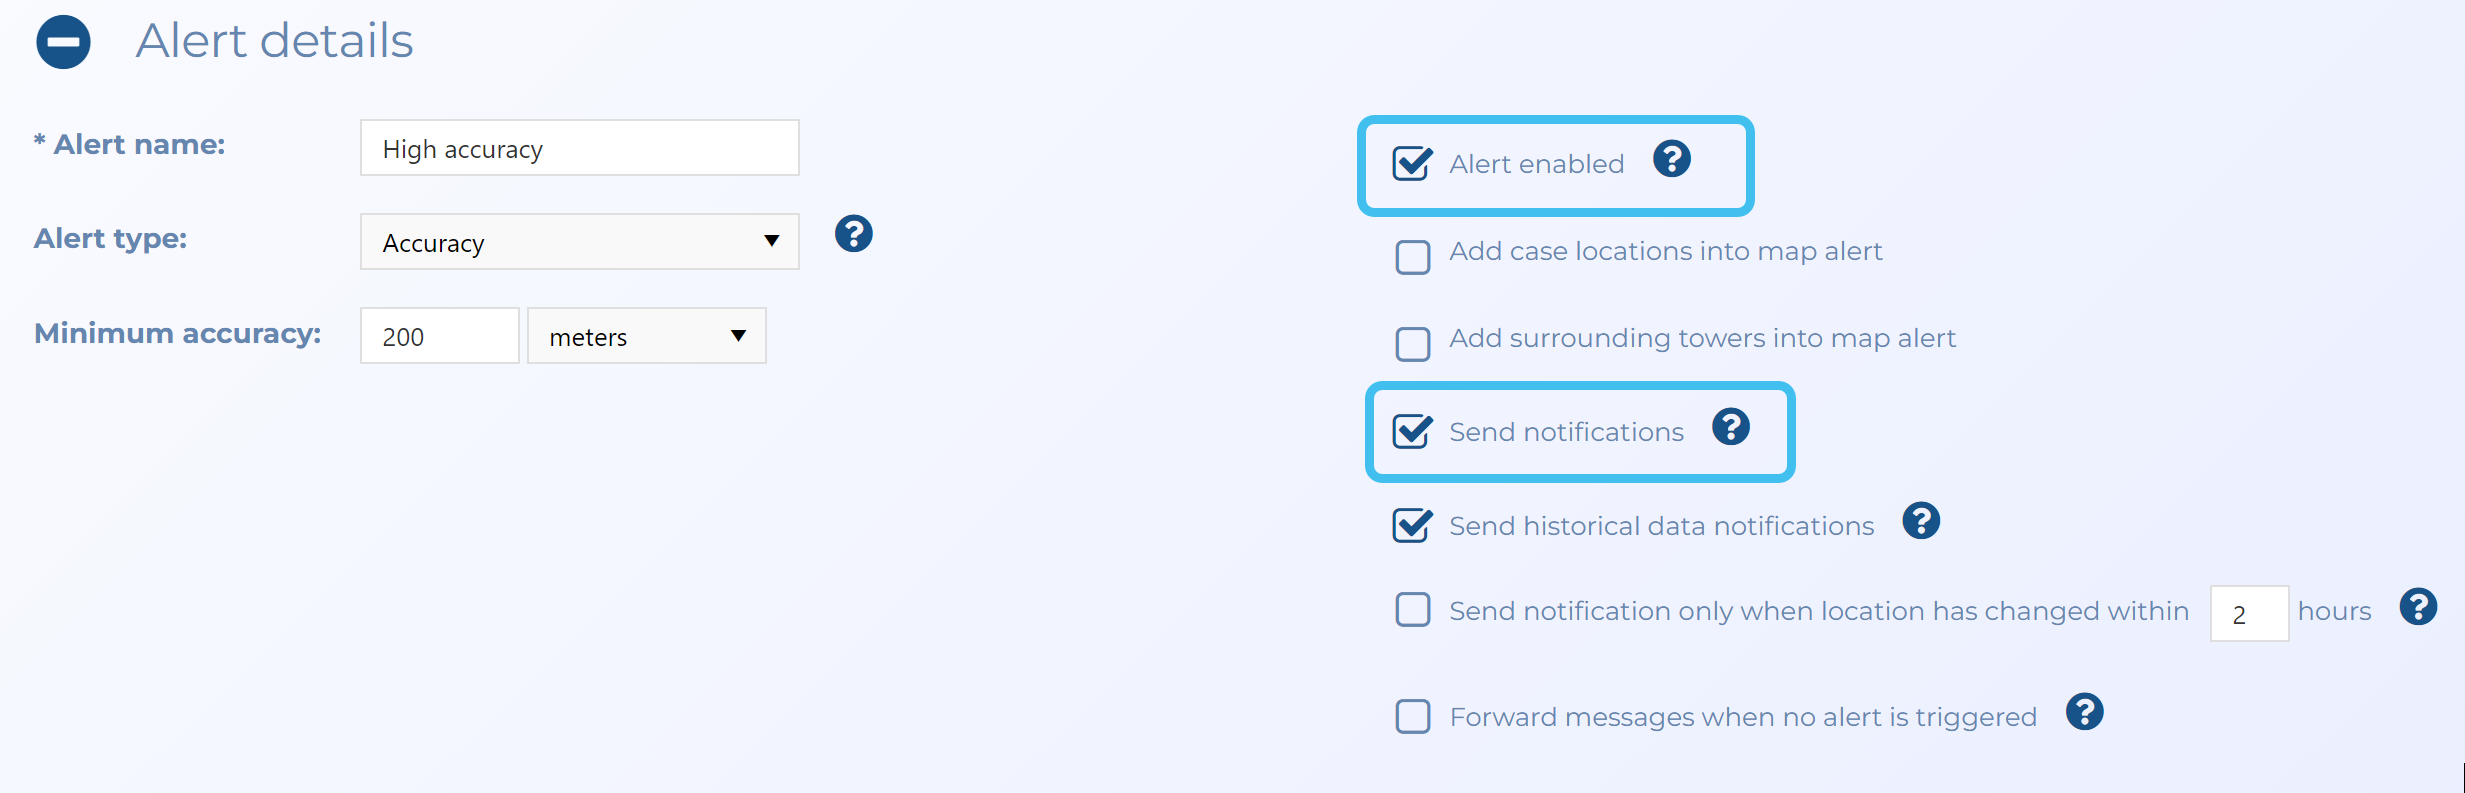
Ensure Alert enabled is selected to ensure the alert is active.
Ensure Send notifications is selected so that live location monitoring notifications are automatically sent.
In Alert type select which type of alert is required. For information on the types refer to Alert type.
The other settings displayed are dependent on what alert type you selected. Select those that are applicable to your alert than in Phone/vehicle/account/i-case, select the check box for each item you want to track.
Phone ON and Phone OFF:
In Phone/vehicle/account/i-case select the check box for each item you want to track, then enter the distance of the call location's minimum accuracy.
Accuracy:
In Phone/vehicle/account/i-case select the check box for each item you want to track.
In Minimum accuracy enter the distance of the call location's minimum accuracy.
Geo-fence or Reverse geo-fence then:
In Phone/vehicle/account/i-case select the check box for each item you want to track.
If you also want alerted if any associates trigger the alert then select Include associate geofence alert and enter a name for the alert in Associate alert name.
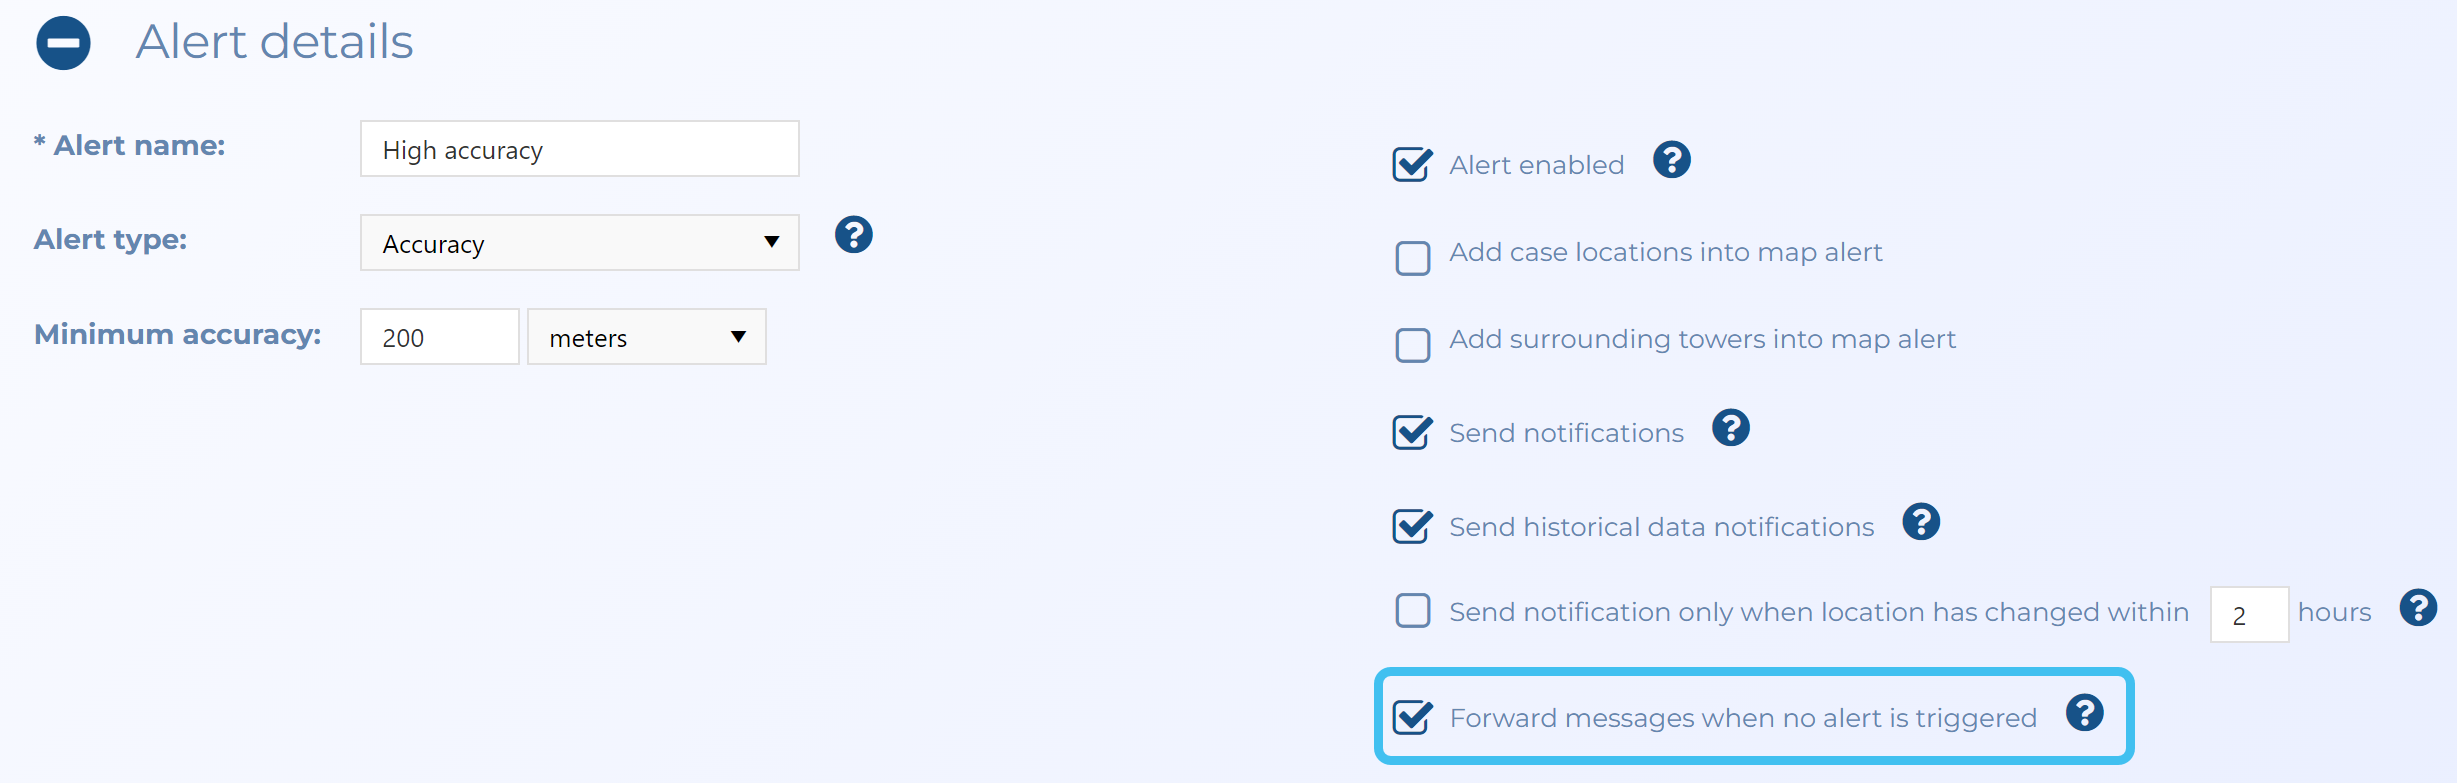
Select Forward messages when no alert is triggered if you want to receive all live location monitoring events even when no alert is triggered.
If you want to set a call location's minimum accuracy then select Minimum accuracy and set the distance.
In Target locations select which target locations you want to receive alerts for.
In Location buffer enter the distance around the target location you are interested in.
For example, if you have Geo-fence selected and you enter a buffer of one mile, then when live location monitoring data is received from within a one mile radius surrounding any selected target location then an email is sent. Or, if you have Reverse geo-fence selected and you enter a buffer of one mile, then when live location monitoring data is received from outside a one mile radius surrounding any selected target location then a notification is sent. For information on notifications refer to Smart Track notifications.
In Phone/vehicle/account/i-case select the check box for each item you want to track.
Location buffer enter the minimum distance between phones that you are interested in.
Alert trigger enter the number of phones required to be within the location buffer and time window before an email is sent.
Time window enter the time period for the selected number of phones to be within the location buffer before an email is sent.
For example, if you enter a location buffer of one mile, a multi-phone proximity alert of all and a time window of 60 minutes, then for a notification to be sent all the selected phone numbers must be within a one mile radius of each other, within a 60 minute time period. For information on notifications refer to Smart Track notifications.
IP - New data IP traffic, IP - International target IP, and IP - Target IP change
In Phone/vehicle/account/i-case select the check box for each item you want to track.
IP - Specific data IP traffic
In Phone/vehicle/account/i-case select the check box for each item you want to track.
In IP address enter the IP address of the specific Website, App, or service of interest.
You can enter a single IP address, or multiple IP addresses either in a range or in a comma-separated list. For example the following formats are all supported:
In Phone/vehicle/account/i-case select the check box for each item you want to track.
In IP address enter the specific target IP address of interest.
You can enter a single IP address, or multiple IP addresses either in a range or in a comma-separated list. For example the following formats are all supported:
In Alert trigger, select the event type that triggers the alert, either:
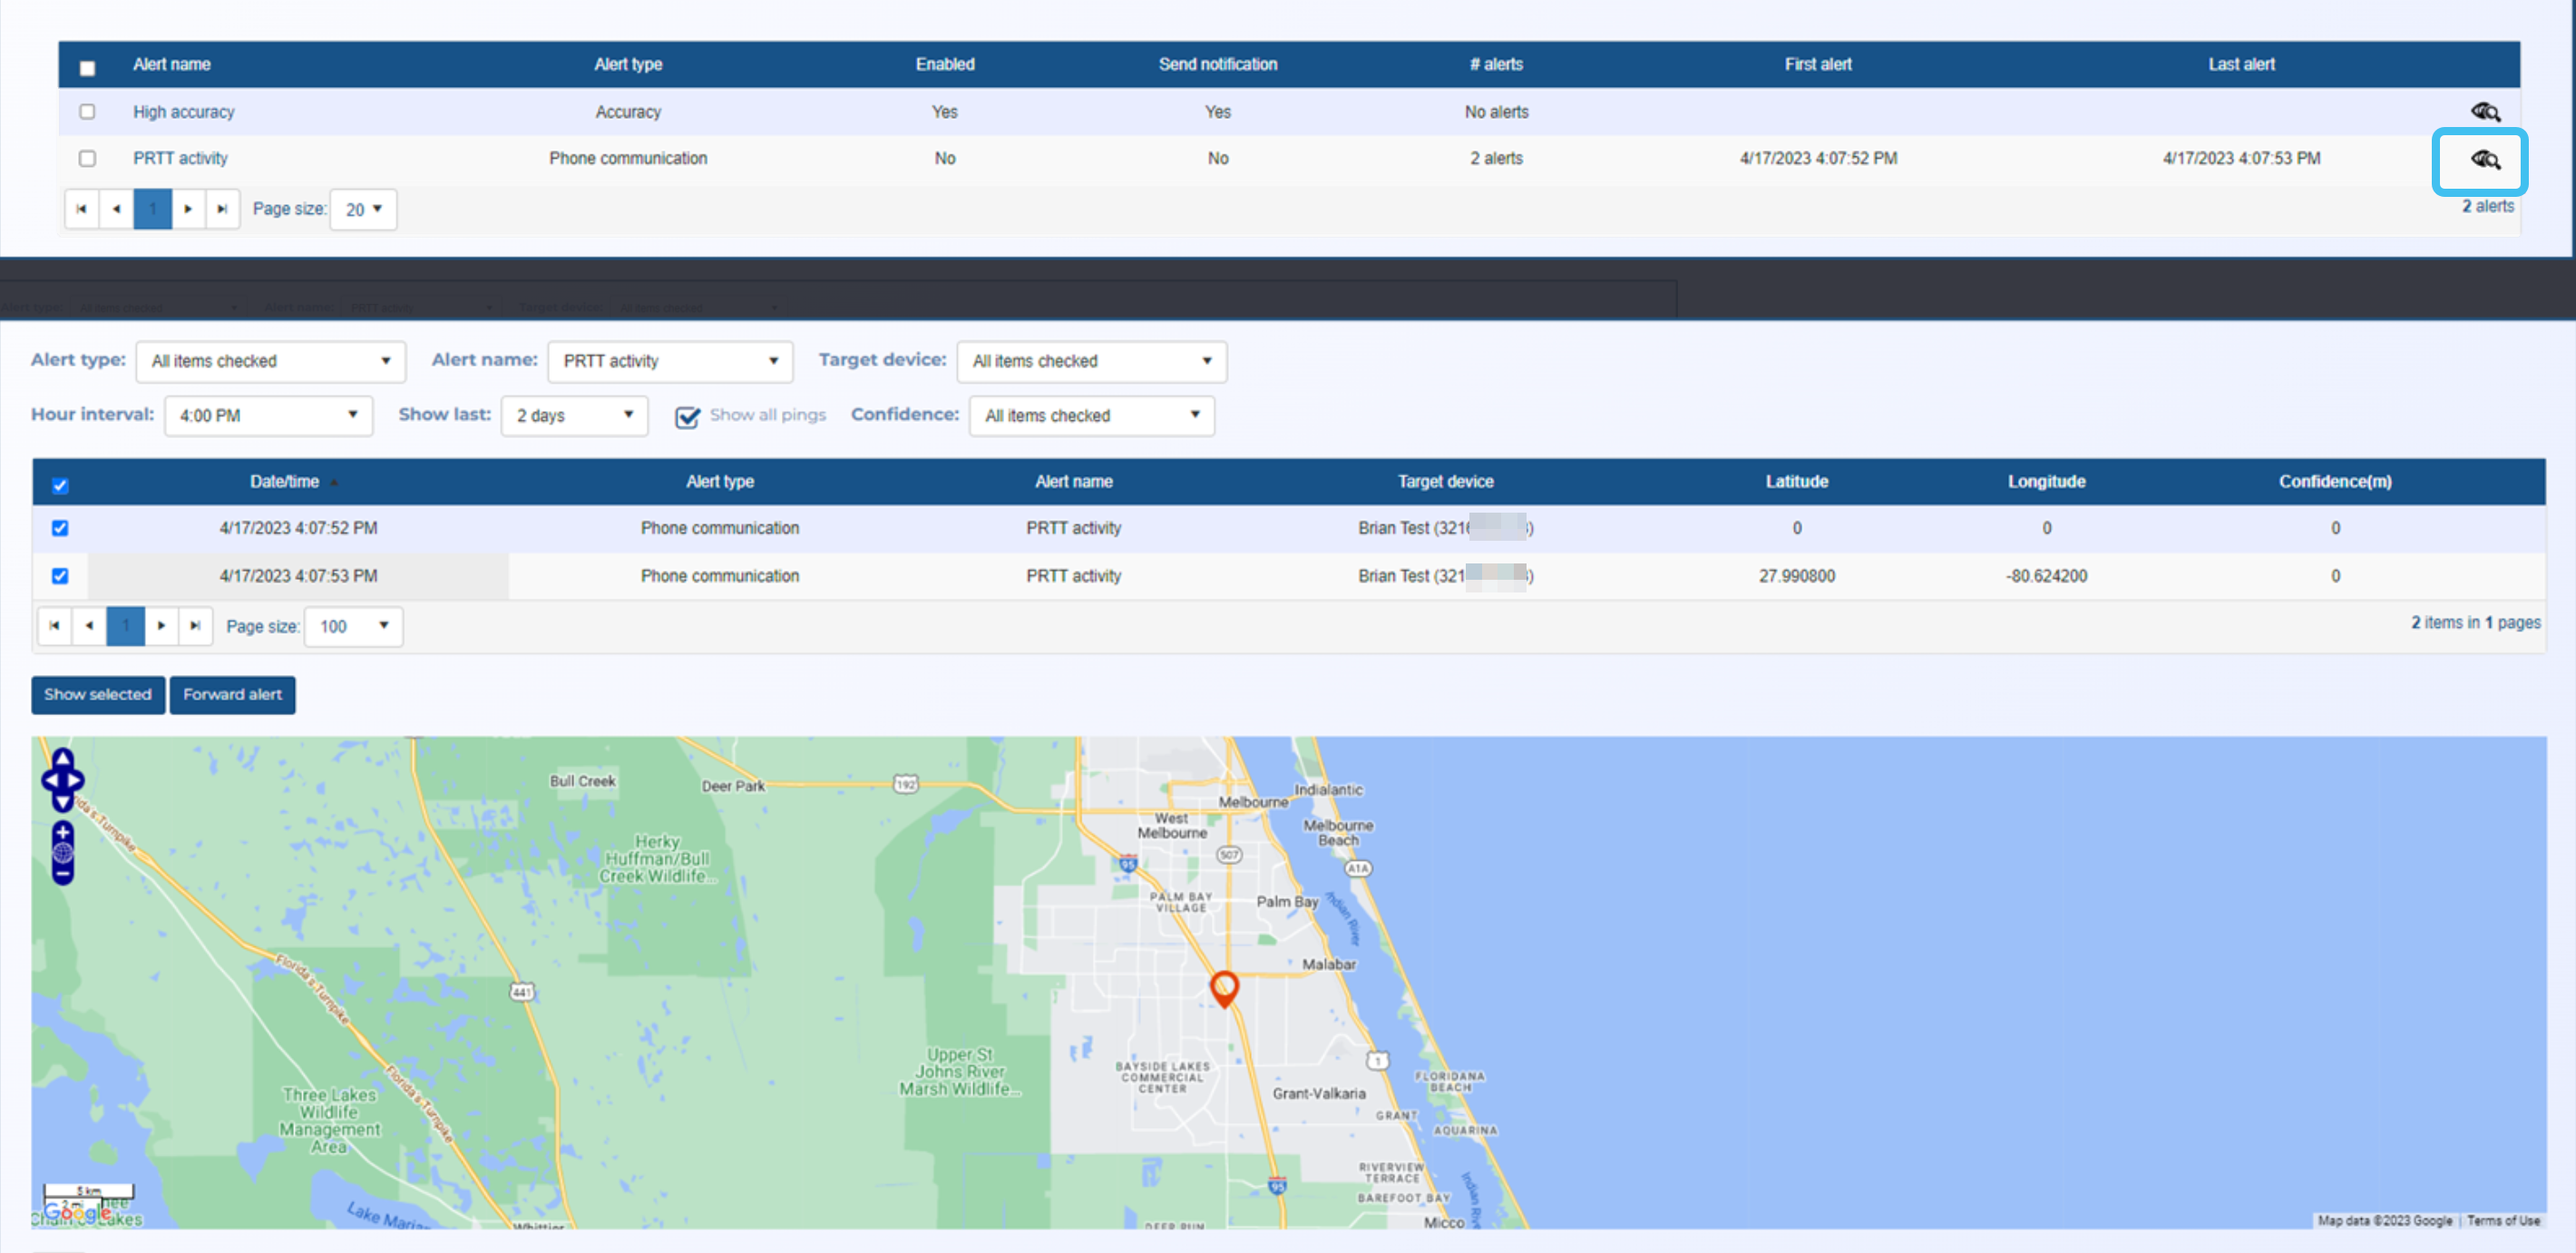
By phone communication: select if you want to monitor when a phone you have an i-case configured for, has communication with any phones that are either entered in the case or are associated with the case. You can select which phone number communications you want an alert triggered for using and . OSS-ESPA will send a PHONE COMMUNICATION email if this alert is triggered.
By global identifier type: select if you want to monitor if there is communication between the selected target and a number with the global identifier type you select in Type.
By global identifier category: select if you want to monitor if there is communication between the selected target and a number with the global identifier category you select in Category.
By specific area code: select if you want to monitor if there is communication between the selected target and a number with the area code you enter in Area code.
By specific country code: select if you want to monitor if there is communication between the selected target and a number with the country code you enter in Country code.
In Phone/vehicle/account/i-case select the check box for each item you want to track.
If the alert trigger you selected is By phone communication then in Associates:
in Sent to any communication by, select which methods of communication you want included in your alert.
select which of the phones that are associated with the case phones you want included in your alert.
By default OSS-ESPA sends email notifications to the case creator and case assignees. However, if you want them notified by phone or SMS message or if you want other people to receive the notifications then click Configure notifications. The Edit Smart Track notifications screen opens.
Select the check box next to a person's name to ensure email notifications are sent to them.
To change the methods used to notify a person select their name then click Edit. Select the additional notification methods which are SMS and Call then click Apply.
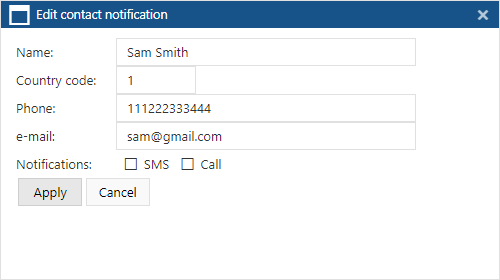
To add a new person to receive notifications who does not have an OSS-ESPA account then click Add. The Edit contact notification dialog box opens. Enter their details including selecting the notification methods then click Apply.
If you have configured anyone to receive phone call or SMS message notifications then you may want to consider entering times in Phone call period so that calls are not being made perhaps during the night. If you want a specific phone notification message sent then enter one in Custom phone message.
Click Save.
Click Save.
The new real time smart track alert is now displayed in the available alerts table.
If you have more alerts to add click New alert and repeat the previous three steps.
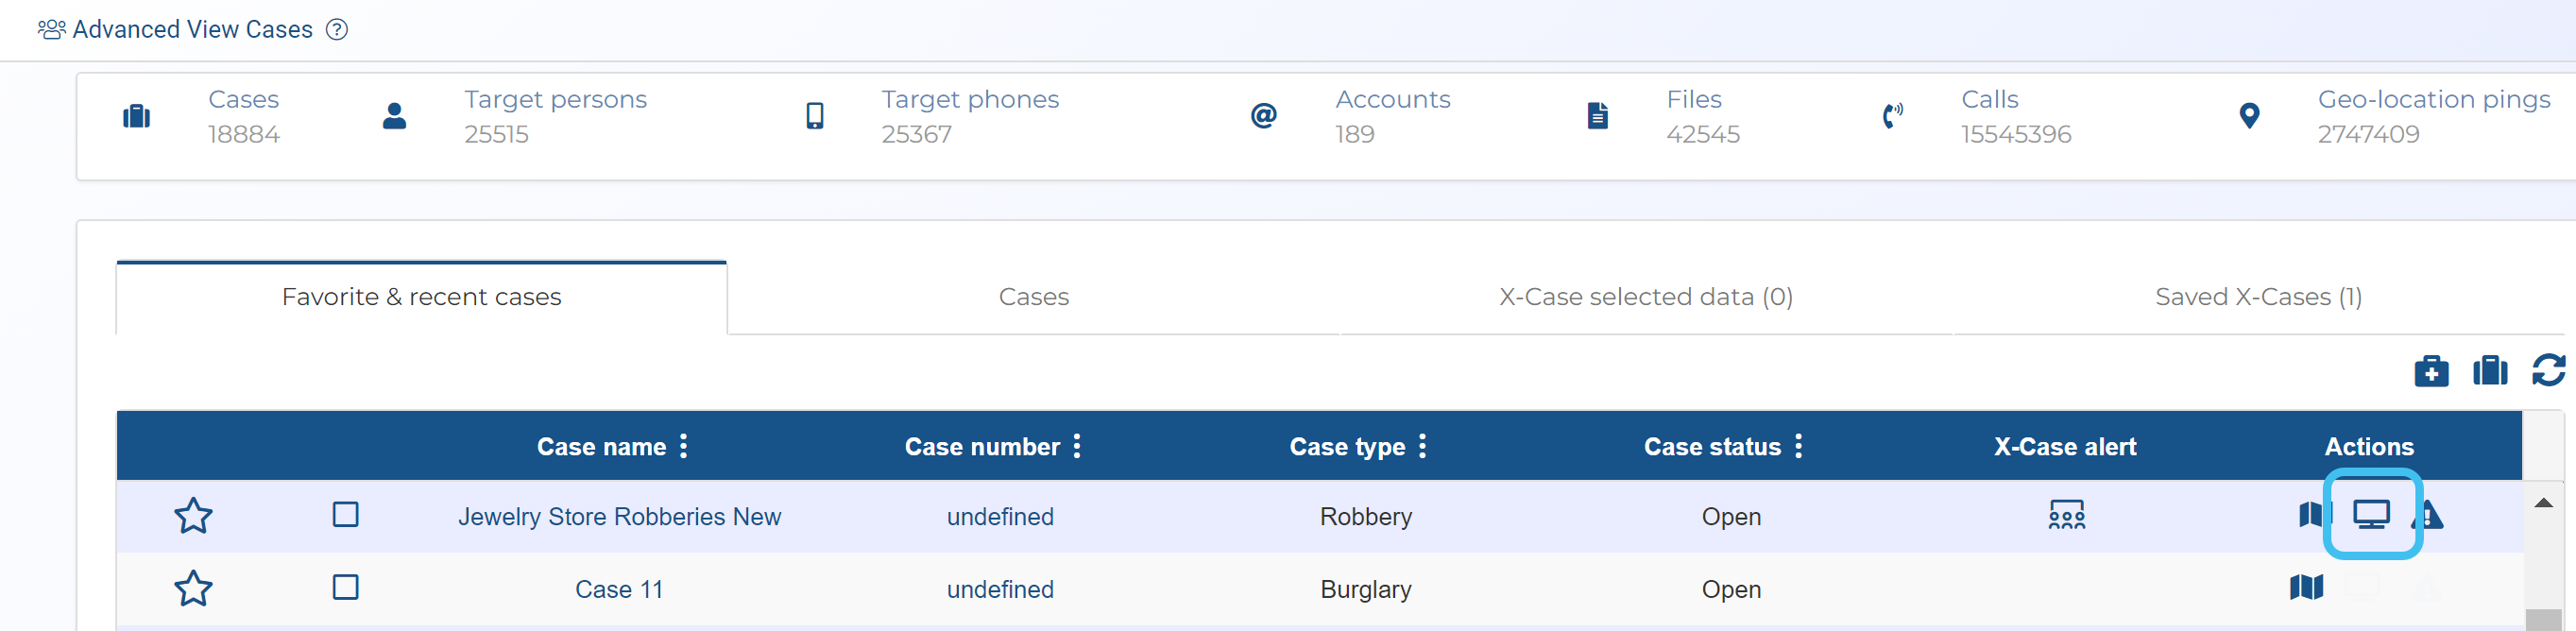
For the case you want to add a Smart Track IP address alert to, on the Advanced view cases screen click .
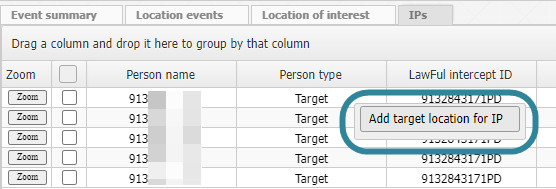
On Sentinel screen's IPs view, right-click the row of the required IP address and select Add target location for IP.
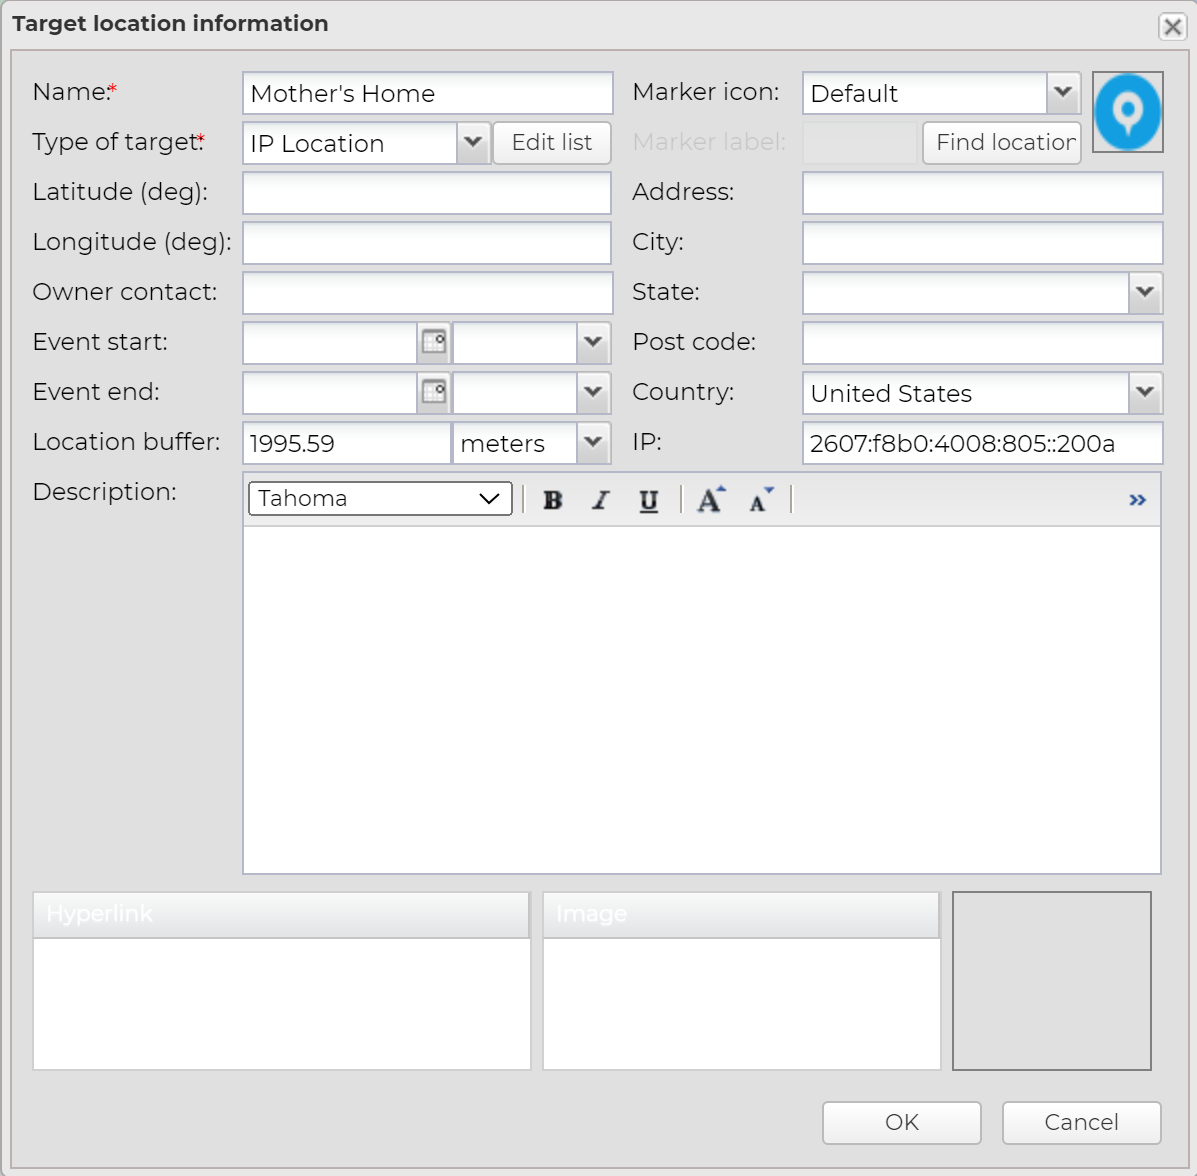
The Target location information dialog box opens with the IP address automatically populated.
In Name, enter a name for the location then complete any optional settings if required.
Open the case's Manage case screen, then in the Smart Track alerts & notifications section click New alert.
The Smart Track alerts & notifications screen opens.
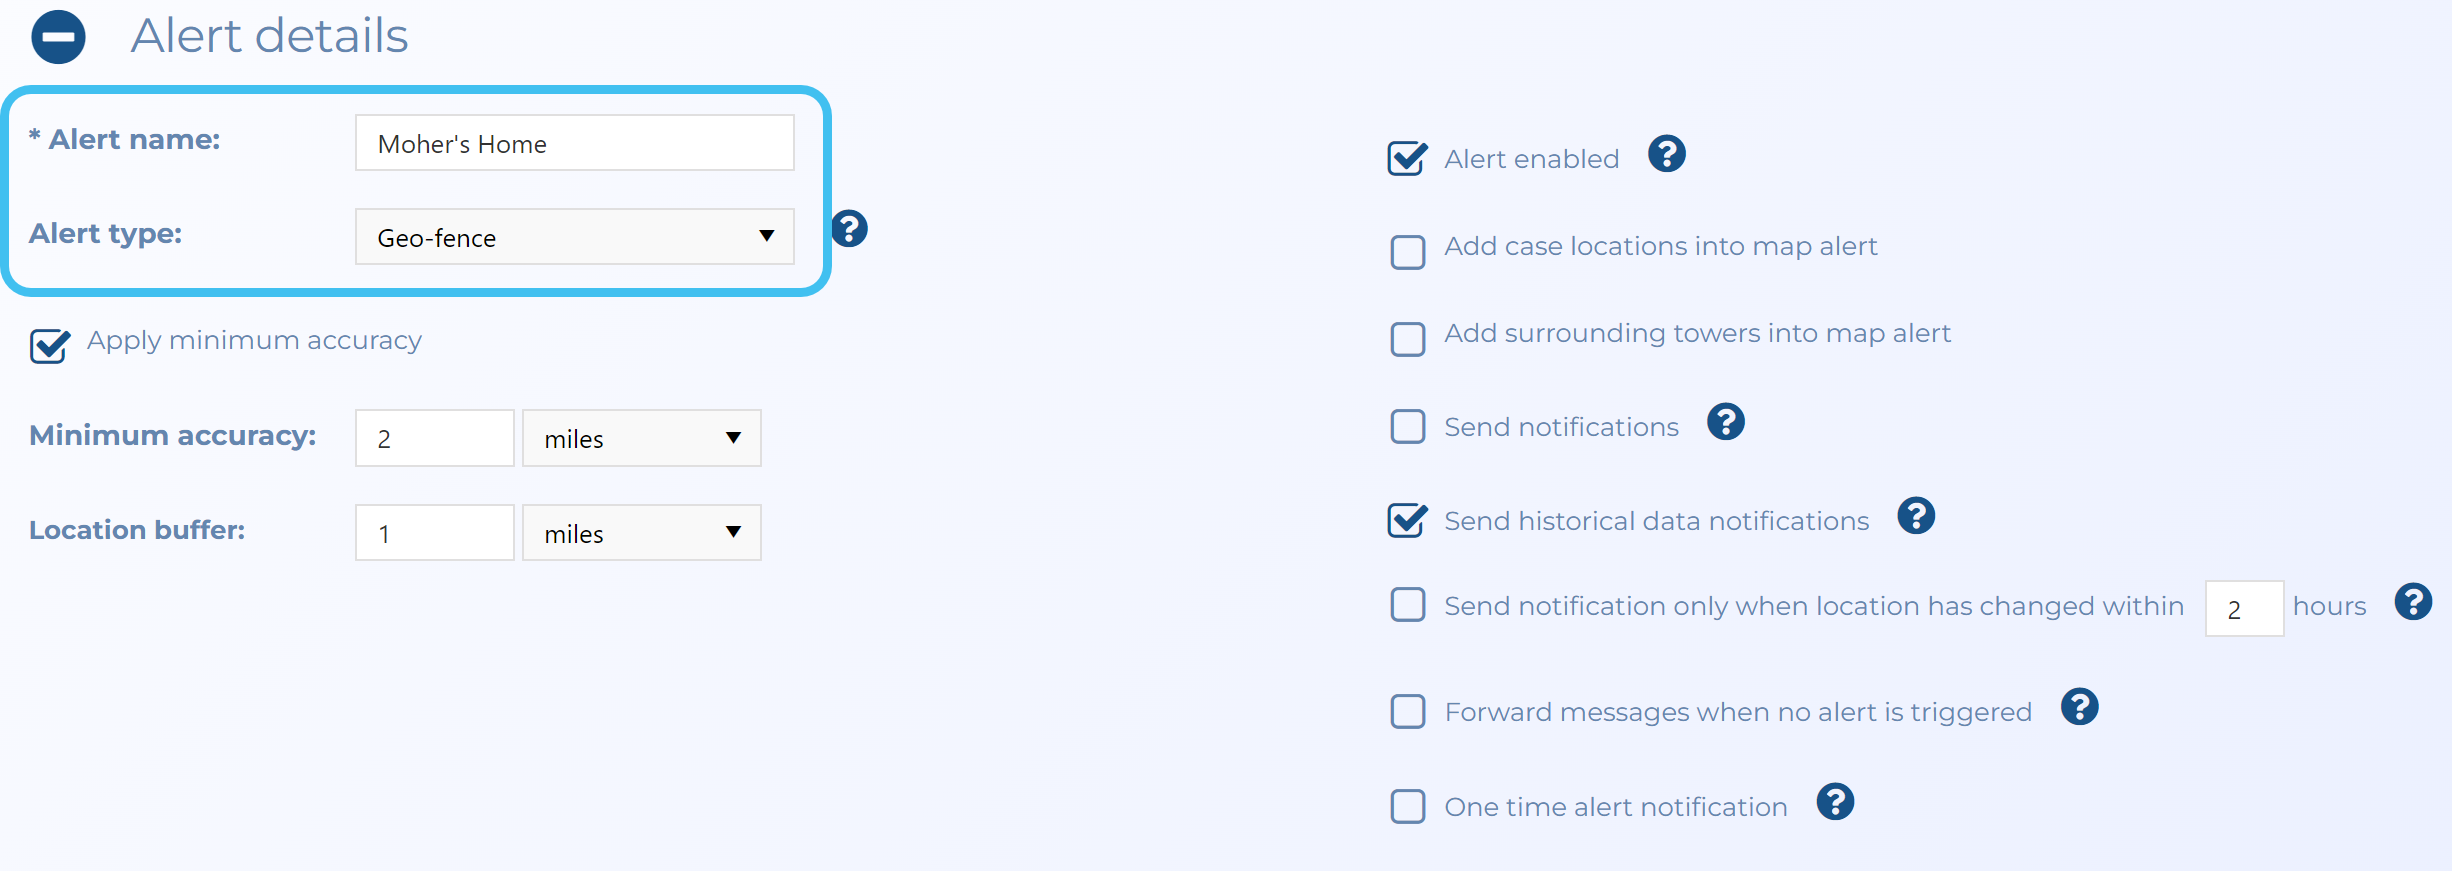
In Alert name, enter a name for your alert.
In Alert type, select Geo-fence.
In Phone/vehicle/account/i-case, select the CaseId.
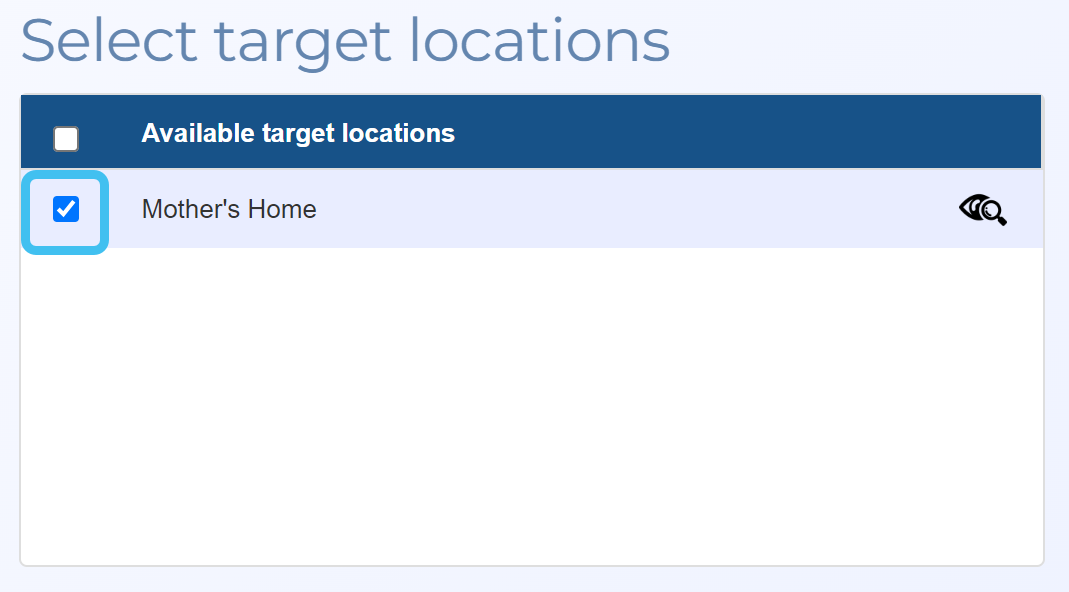
In Select target locations, select the new IP's target location.
By default OSS-ESPA sends email notifications to the case creator and case assignees. However, if you want them notified by phone or SMS message or if you want other people to receive the notifications then click Configure notifications. The Edit Smart Track notifications screen opens.
Select the check box next to a person's name to ensure email notifications are sent to them.
To change the methods used to notify a person select their name then click Edit. Select the additional notification methods which are SMS and Call then click Apply.
To add a new person to receive notifications who does not have an OSS-ESPA account then click Add. The Edit contact notification dialog box opens. Enter their details including selecting the notification methods then click Apply.
If you have configured anyone to receive phone call or SMS message notifications then you may want to consider entering times in Phone call period so that calls are not being made perhaps during the night. If you want a specific phone notification message sent then enter one in Custom phone message.
This procedure allows you to generate recurring Smart Track reports at an occurrence you can specify. You can specify: whether the report generates every number of days or hours, at which time of the server it runs, and optionally which date it generates up until. The report contains all the Smart Track live target location data such as GPS pings, social media locations and IP emails.
You can request recurring smart track reports from both the Manage case and Smart Track alerts & notifications screens. This procedure explains how to do this from the Manage case screen.
For the case you want to request a smart track recurring report for, open the Manage case screen.
On the main menu click View cases. The screen that opens depends on your setting of View cases. If it is set to:
Advanced view, then the Advanced view cases screen opens.
If your case is listed on the Favorite & recent cases tab, click the case name to open the Manage case screen.
If it is not listed on the Favorite & recent cases tab, then click the Cases tab. Use the search filters to help locate your case. You can also click to open the FILTERS group which allows you to set your own default filter defining what is displayed on this tab, for example you may wish to set it to cases that you created which are currently open.
If your case is listed under My recent cases click it to open the Manage case screen.
If it is not listed under My recent cases then select your case from the table, using the search filters to help locate it if required. Note, by default the search is set to only display cases that you created; if you are not the original creator but an assignee then ensure you set Case filter to Assigned cases before clicking Search.
Tree view, then the View i-cases screen opens.
Click at the top-right of the screen to open either the View Cases or Advanced view cases screen and follow the above description.
In the Smart Track alerts & notifications section click Recurrent report.
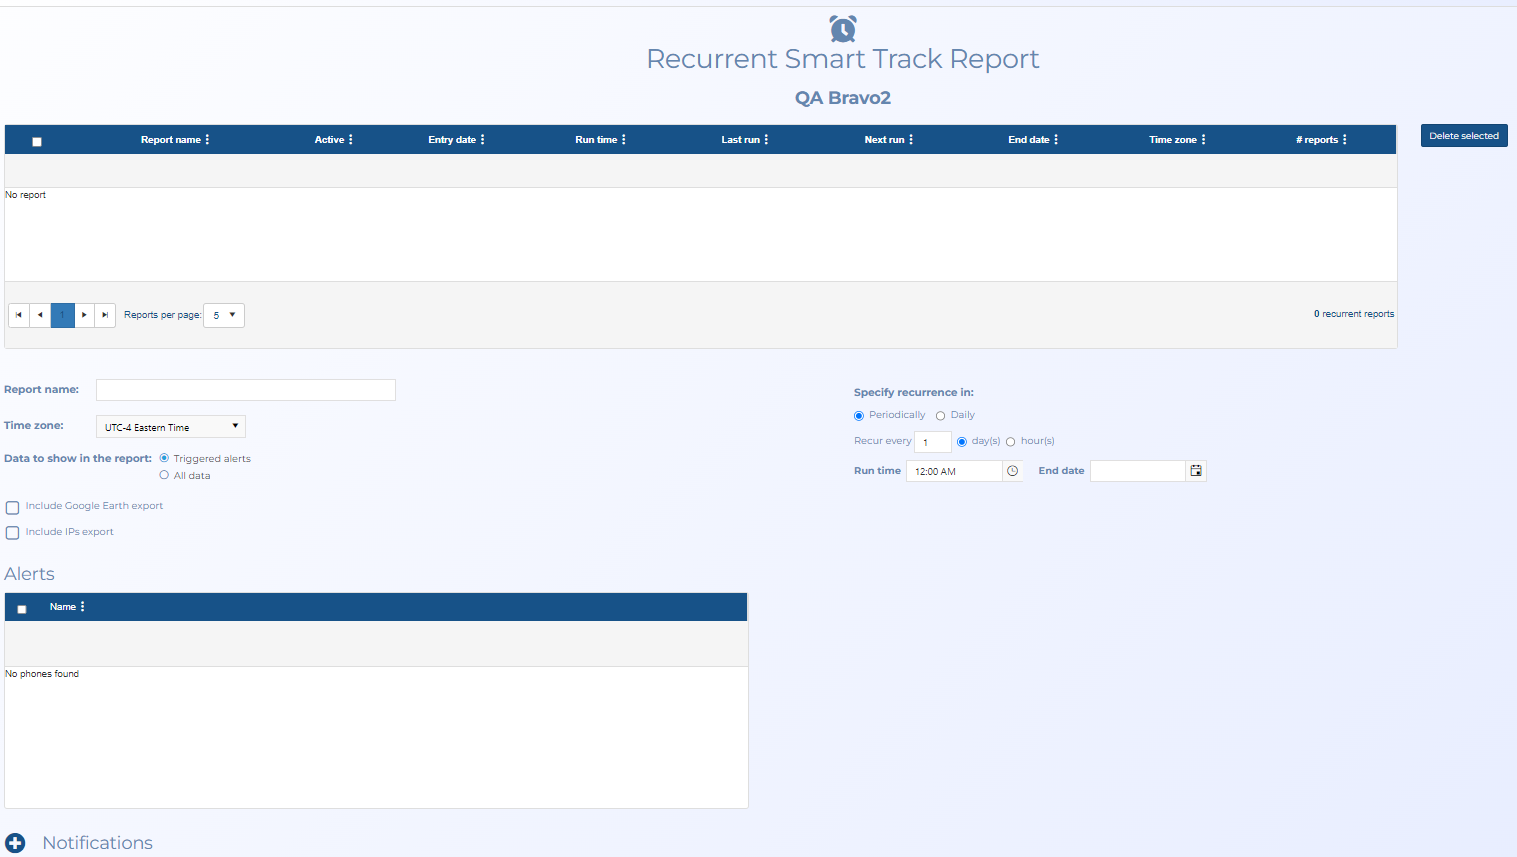
The Recurrent Smart Track report screen opens.
In Report name enter a name for your report.
In Time zone select the time zone in which you want the report results to be displayed.
In Data to show in report select what data you want included in the report, either only the triggered alerts or all the data.
In Specify recurrence in select the frequency of the report generation.
In Run time select what time you want the report to generate. This is the time based on your server location.
In End date enter which date you want the report to stop generating. If no date is entered the report will generate until you either delete it, or you set the Active column in the table to No.
In Alerts select which of your configured alerts you want included in the report.
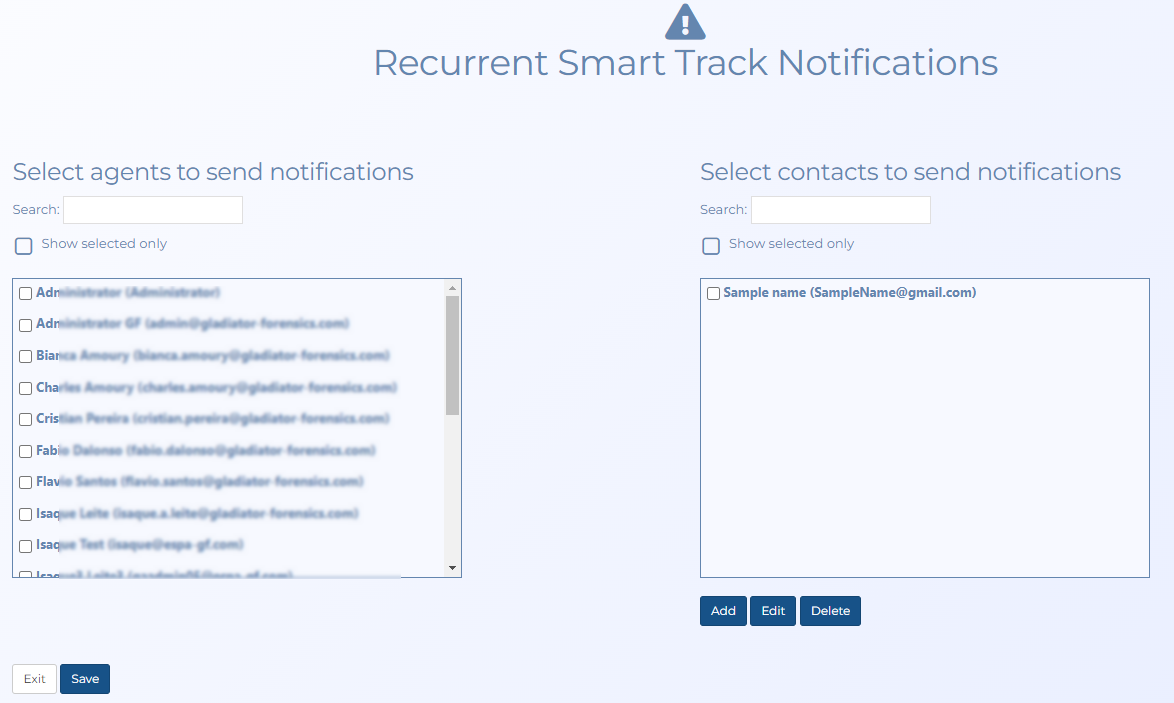
By default OSS-ESPA sends email notifications to the case creator, case assignees. However, if you want other people to receive the notifications then click Configure notifications. The Recurrent Smart Track Notifications screen opens.
Select the check box next to a person's name to ensure email notifications are sent to them.
To add a new person to receive notifications who does not have an OSS-ESPA account then click Add. The Edit contact notification dialog box opens. Enter their details including selecting the notification methods then click Apply.
Click Save.
Click Save.
You will now start to receive the recurrent report you requested.
How do I request historical data for creating a Smart Track evidence report?
How to request a historical Smart Track report
You can request smart track historical reports from both the Manage case and Smart Track alerts & notifications screens. This procedure explains how to do this from the Manage case screen.
For the case you want to request a smart track historical report for, open the Manage case screen.
On the main menu click View cases. The screen that opens depends on your setting of View cases. If it is set to:
Advanced view, then the Advanced view cases screen opens.
If your case is listed on the Favorite & recent cases tab, click the case name to open the Manage case screen.
If it is not listed on the Favorite & recent cases tab, then click the Cases tab. Use the search filters to help locate your case. You can also click to open the FILTERS group which allows you to set your own default filter defining what is displayed on this tab, for example you may wish to set it to cases that you created which are currently open.
If your case is listed under My recent cases click it to open the Manage case screen.
If it is not listed under My recent cases then select your case from the table, using the search filters to help locate it if required. Note, by default the search is set to only display cases that you created; if you are not the original creator but an assignee then ensure you set Case filter to Assigned cases before clicking Search.
Tree view, then the View i-cases screen opens.
Click at the top-right of the screen to open either the View Cases or Advanced view cases screen and follow the above description.
In the Smart Track alerts & notifications section click Historical report.
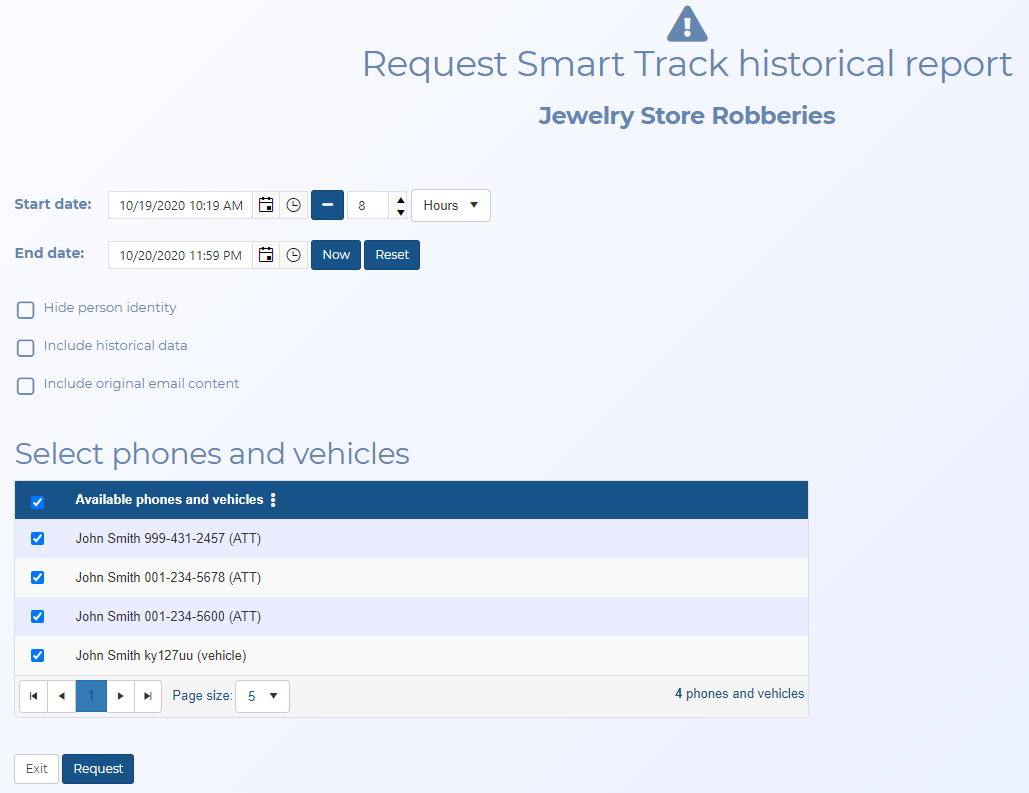
The Request Smart Track historical report screen opens.
In Start date and End date select the date range for your historical report.
Select Hide person identityif you want to hide the name of the person who you are tracking from the historical report.
Select Include historical data if you want to include the historical data in the report.
Select Include original email content to include all the original email content in your historical report. If you do not include this you receive only the table with the GPS pings and the summary. It is recommended that you select this if you are creating evidence reports.
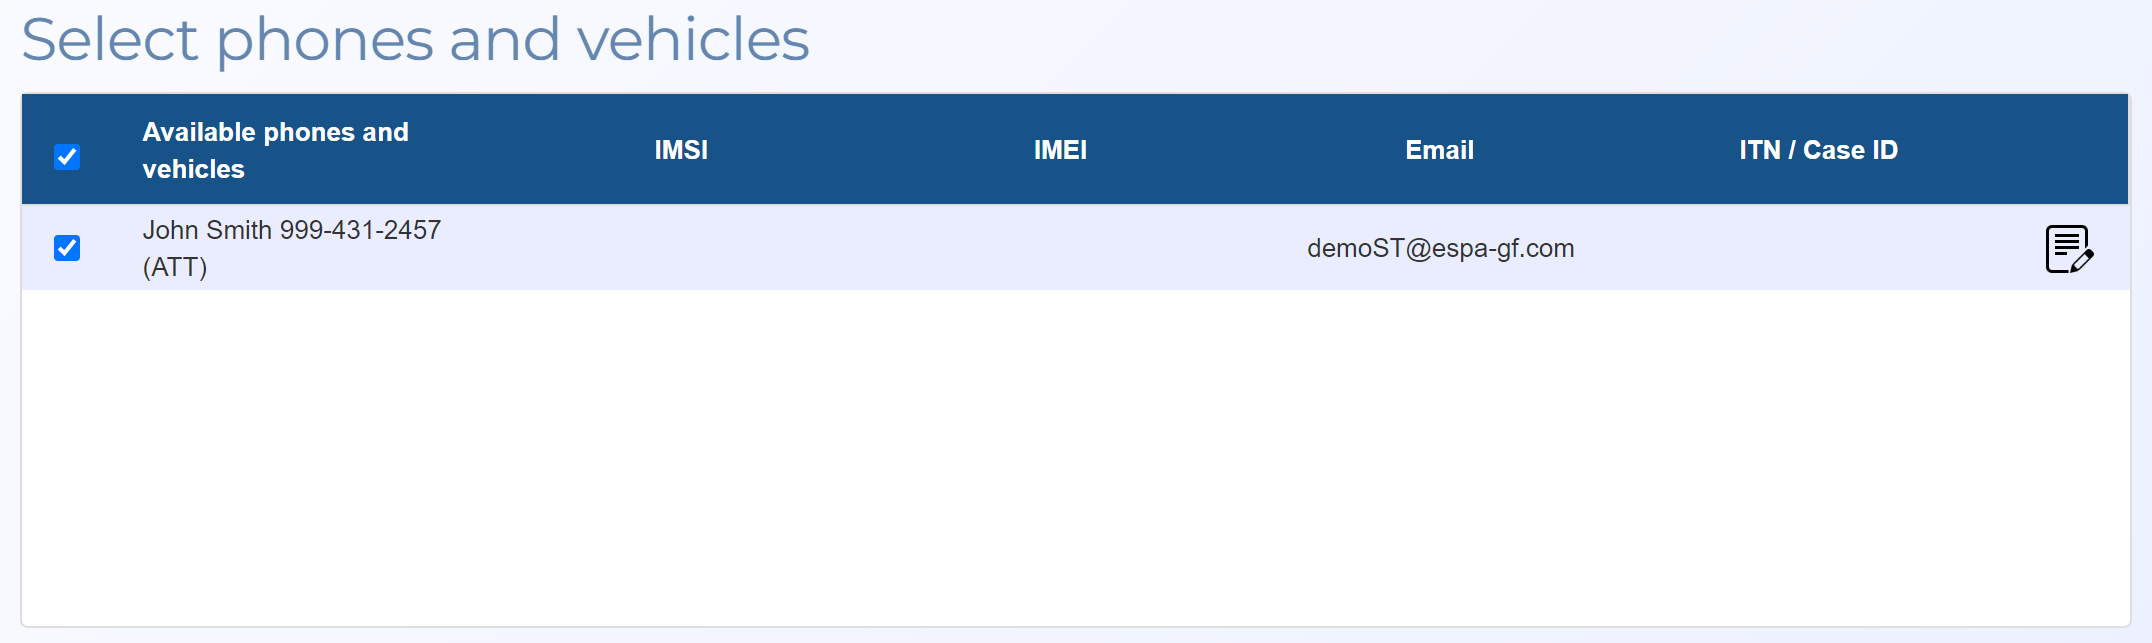
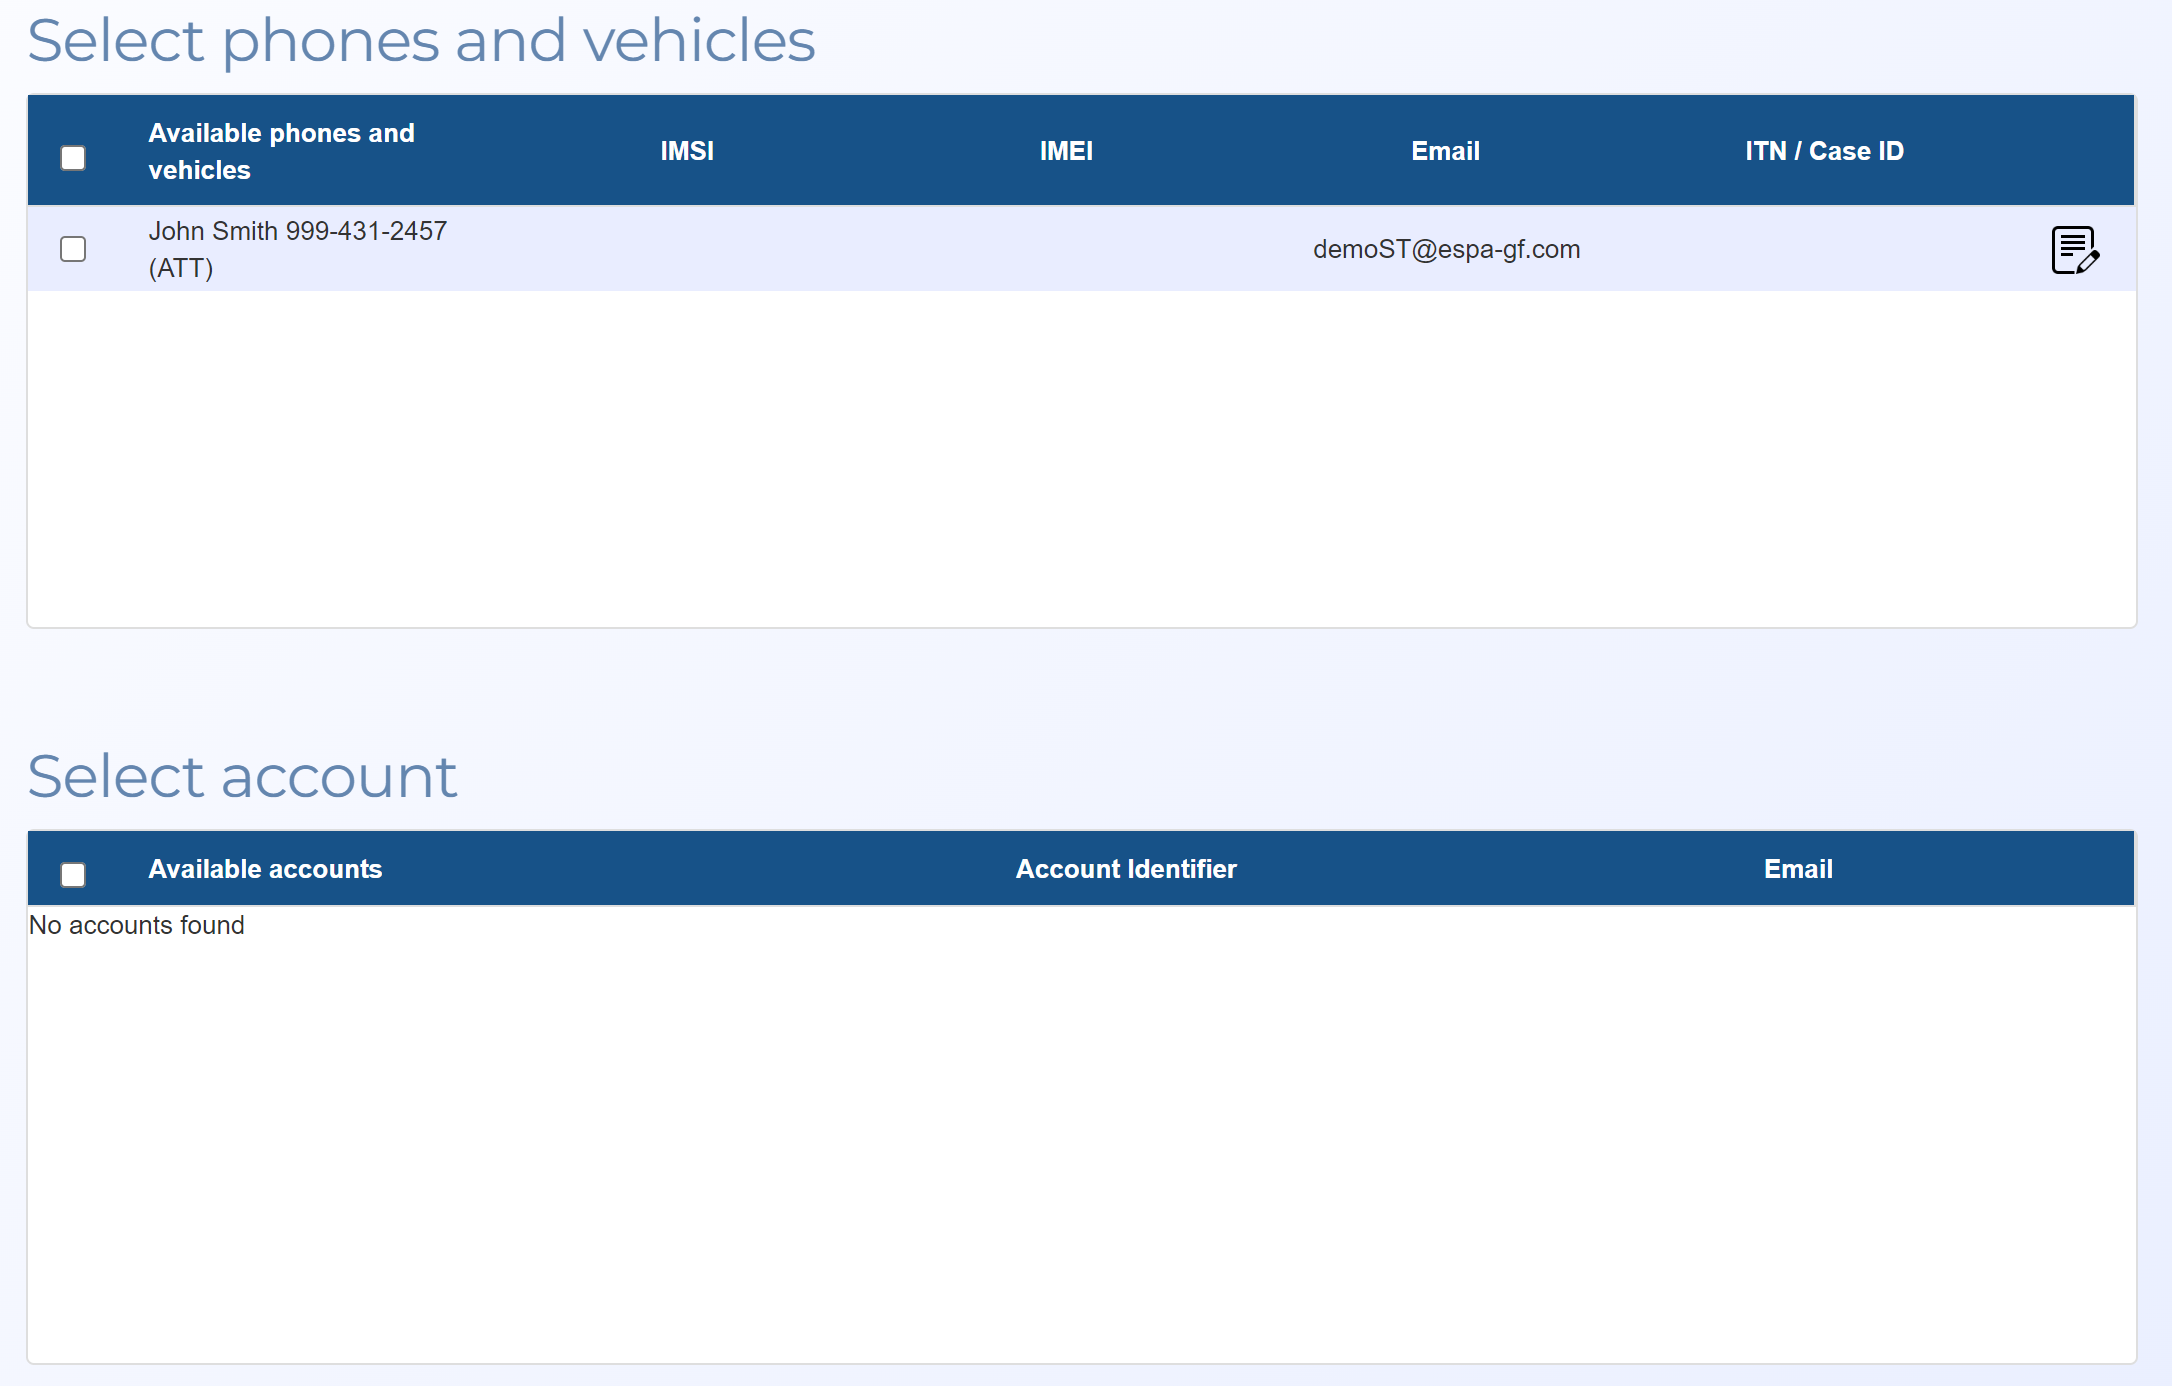
In Select phones and vehicles select which phones and vehicles you want included in the report. Note, the only phones that are displayed are those who have a provider that supports live location monitoring, which is currently only ATT, T-Mobile,Sprint and Verizon.
Click Request.
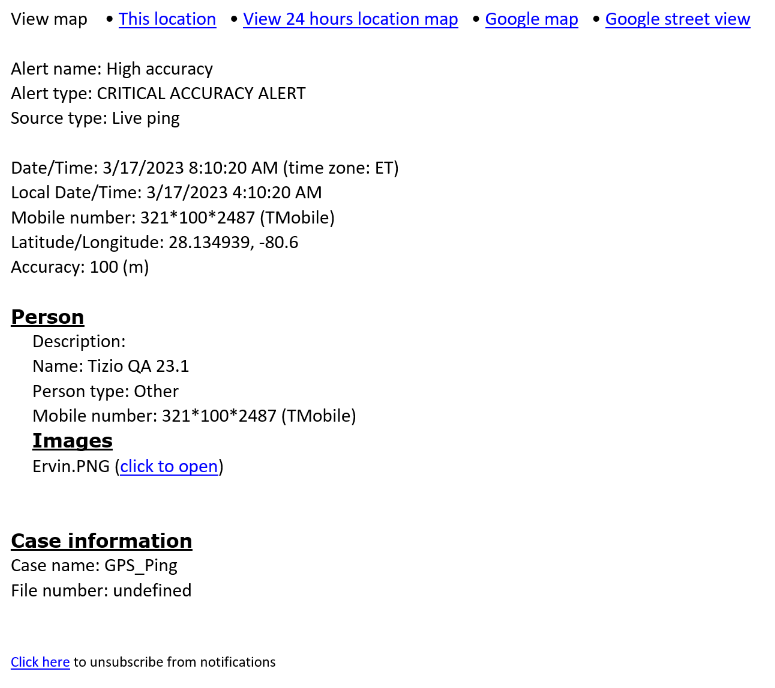
You will now receive the historical report you requested. An example is shown below.
On the main menu click View cases. The screen that opens depends on your setting of View cases. If it is set to:
Advanced view, then the Advanced view cases screen opens.
If your case is listed on the Favorite & recent cases tab, click the case name to open the Manage case screen.
If it is not listed on the Favorite & recent cases tab, then click the Cases tab. Use the search filters to help locate your case. You can also click to open the FILTERS group which allows you to set your own default filter defining what is displayed on this tab, for example you may wish to set it to cases that you created which are currently open.
If your case is listed under My recent cases click it to open the Manage case screen.
If it is not listed under My recent cases then select your case from the table, using the search filters to help locate it if required. Note, by default the search is set to only display cases that you created; if you are not the original creator but an assignee then ensure you set Case filter to Assigned cases before clicking Search.
Tree view, then the View i-cases screen opens.
Click at the top-right of the screen to open either the View Cases or Advanced view cases screen and follow the above description.
On the Manage case screen, in the Smart Track alerts & notifications section click the name of the alert you want to set notifications for.
The Edit smart track alerts & notifications screen opens with the settings for the alert you selected displayed on the screen.
Click beside Notifications, then click Configure notifications.
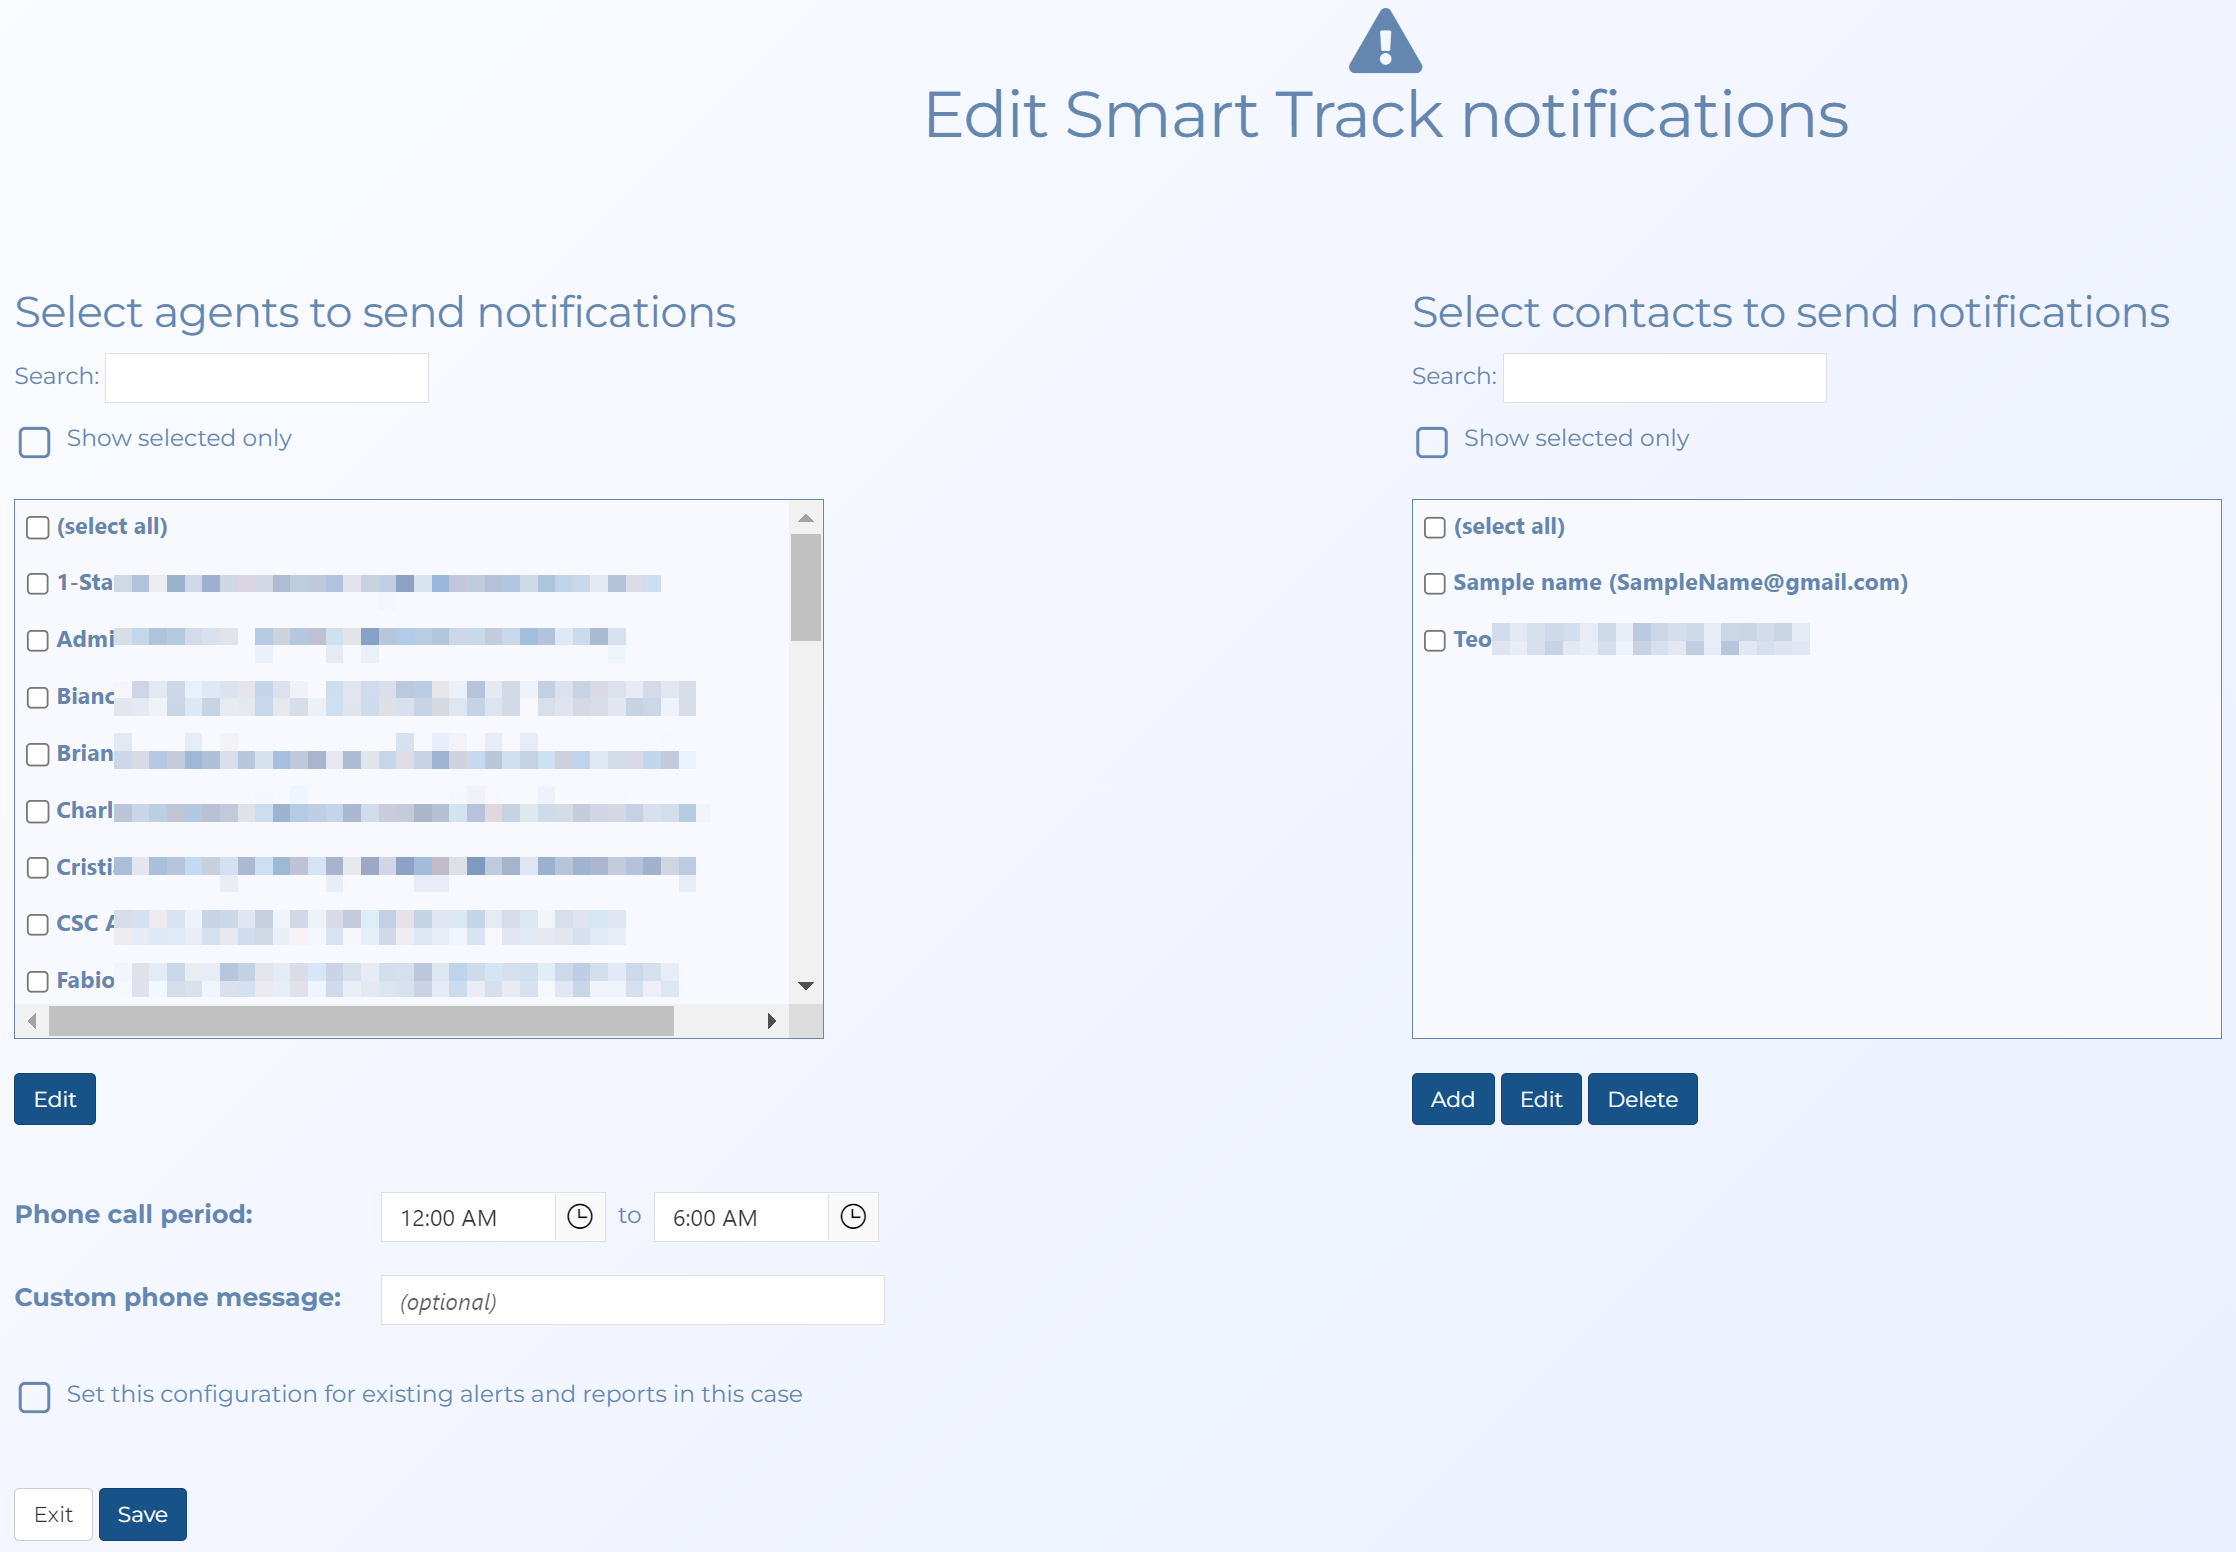
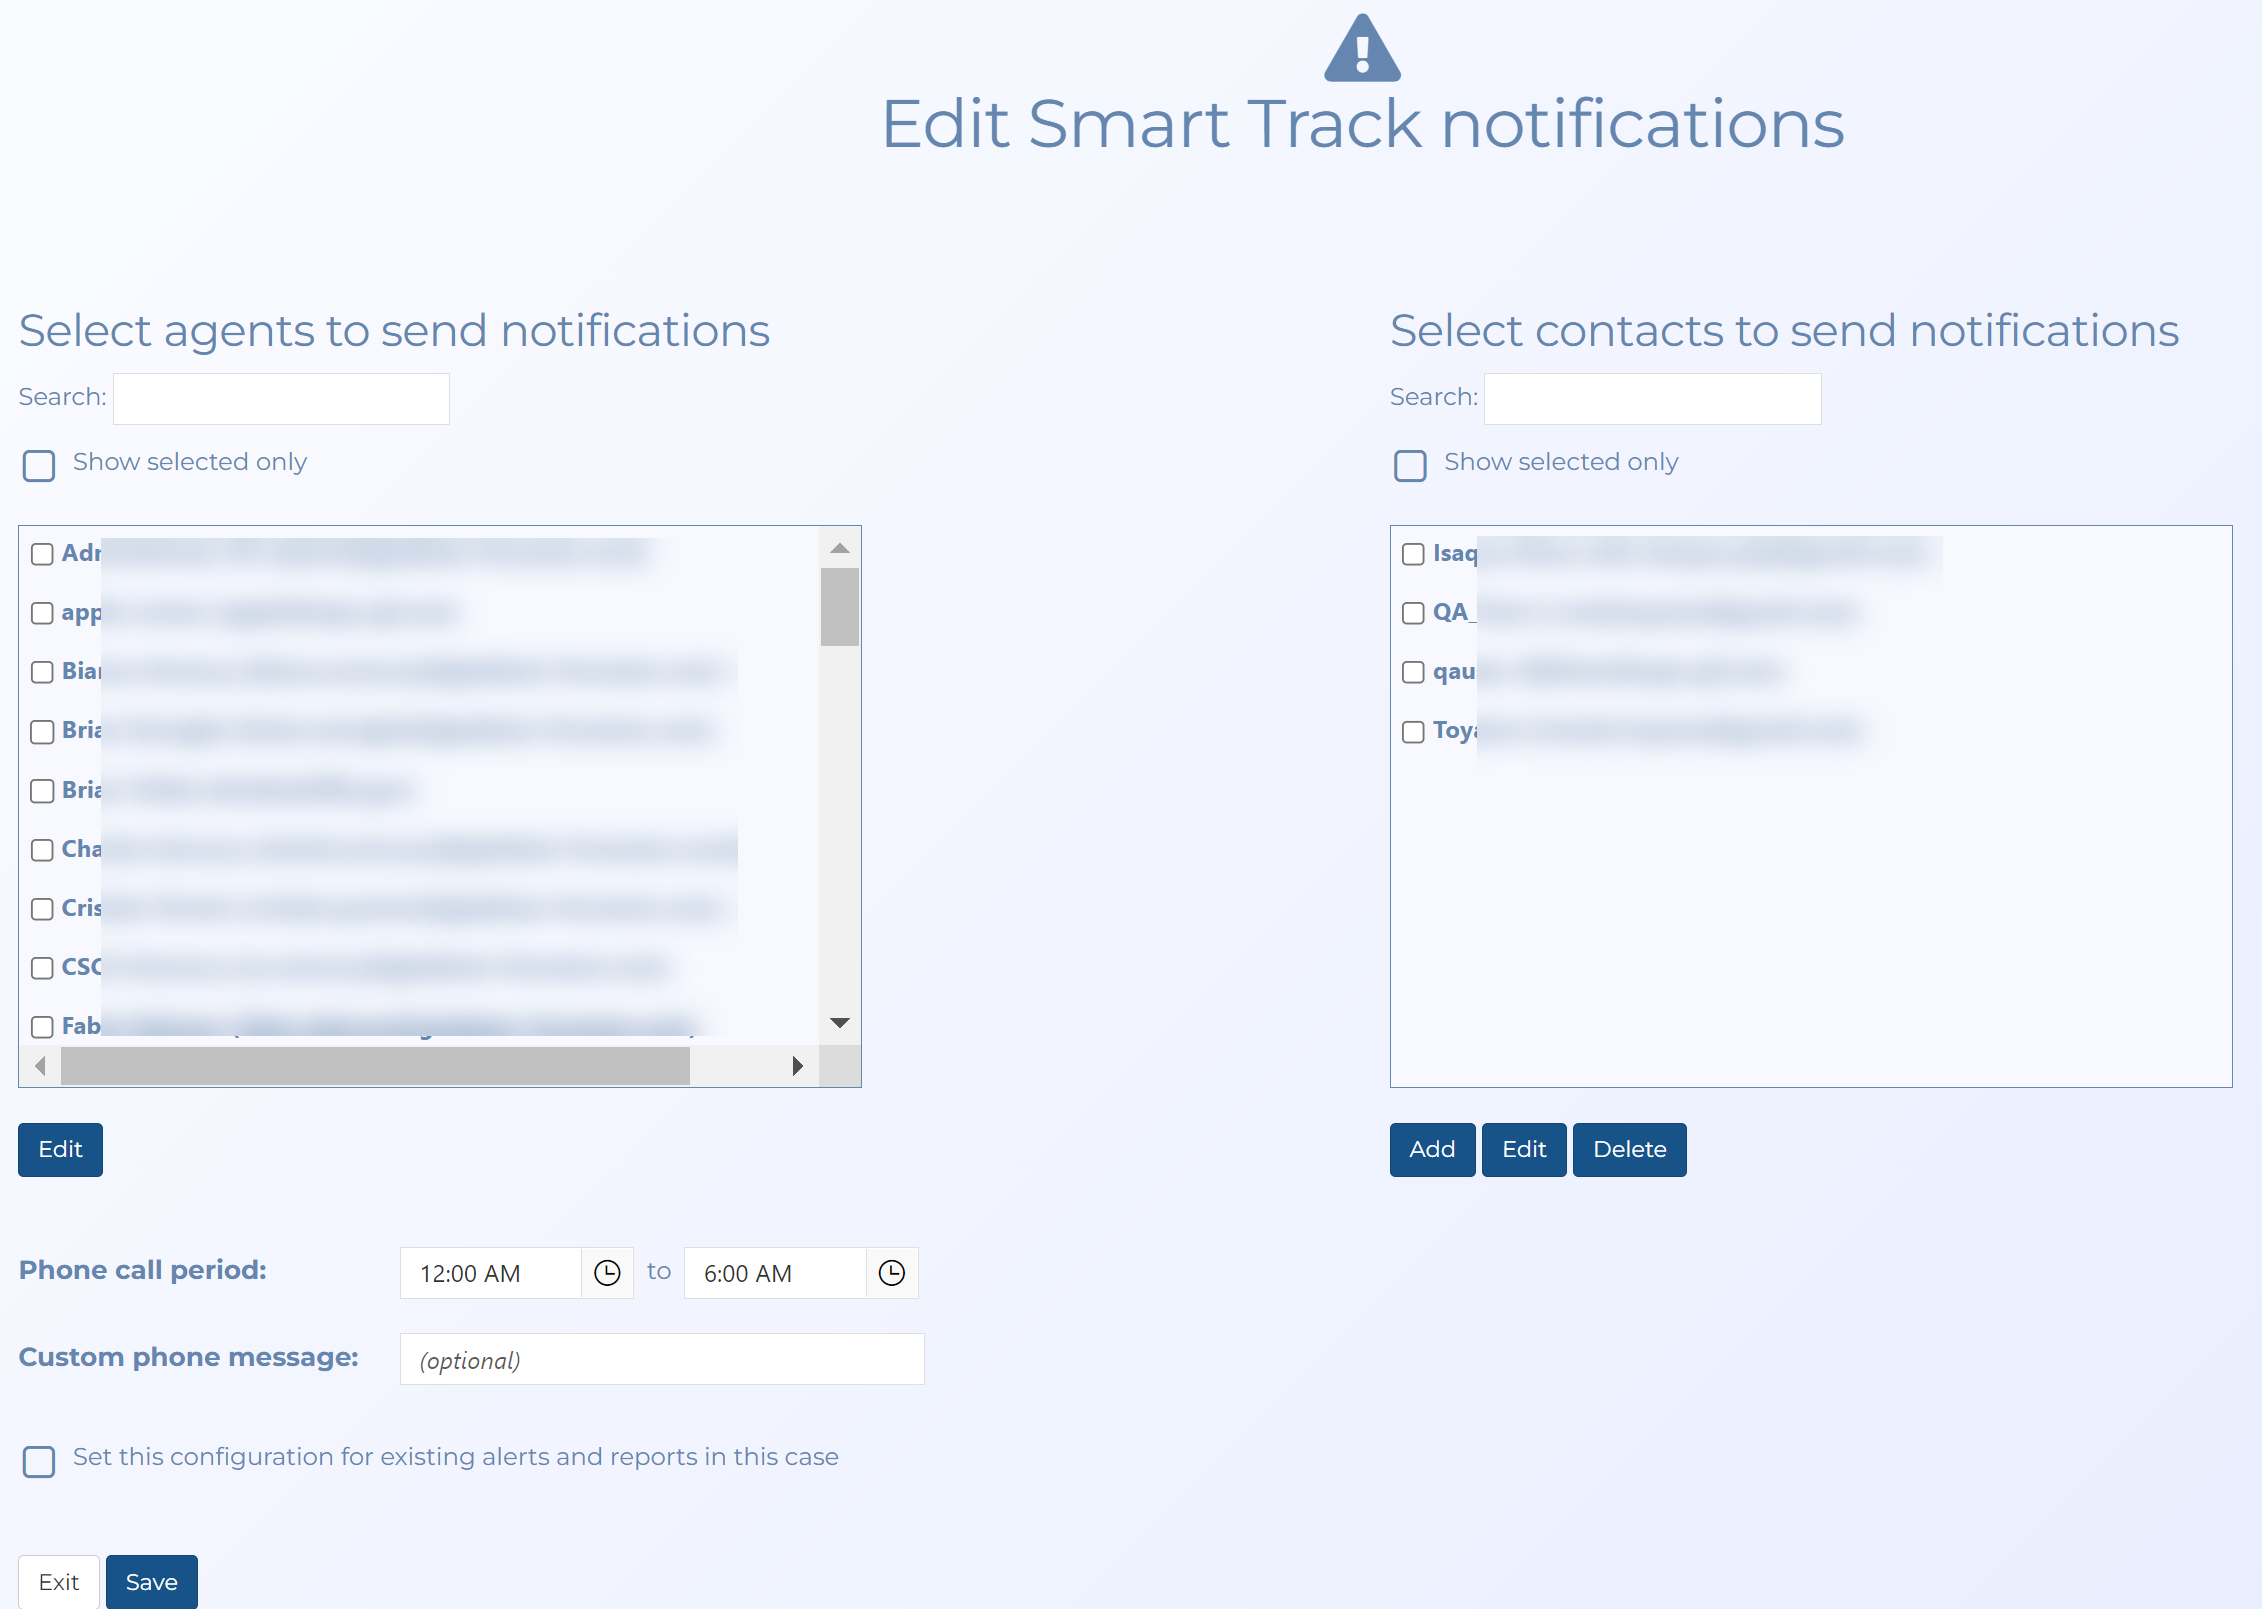
The Edit Smart Track notifications screen opens.
Select the agents and contacts who you want to receive the notifications. Note:
Select agents to send notifications, on the left, contains the names of people who have an OSS-ESPA account that you want to receive live location monitoring notifications for the case. Click Edit if you want to select any additional methods of notification, that is SMS message or phone call. The Edit agent notification dialog box dialog box opens.
Select contacts to send notifications, on the right, contains the names of people who do not have an OSS-ESPA account that you want to receive live location monitoring notifications emails for the case. Click Edit if you want to edit their notification details including their additional methods of notification, that is SMS message or phone call. The Edit contact notification dialog box opens. You can also click Add, to open the Edit contact notification dialog box which allows you to enter the phone and email details of new contacts who do not have an OSS-ESPA account, and the additional methods, other than email, by which they want notified.
In Phone call period, enter the time period that you want OSS-ESPA to send notifications via phone calls and SMS messages, for example you may want to limit this to time during the day.
In Custom phone message, enter the notification message you want used if the notification method is phone calls and SMS messages. For example, "John Smith has left mother's home".
Click Save.
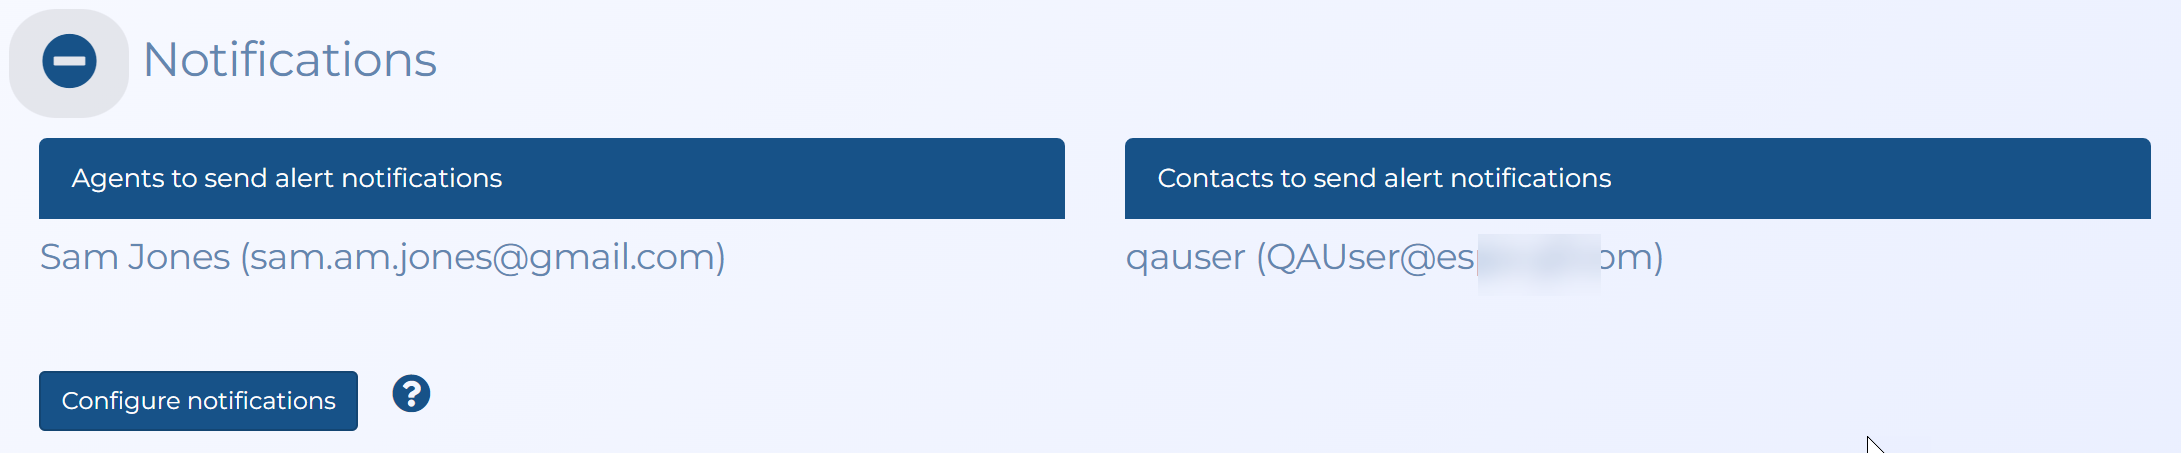
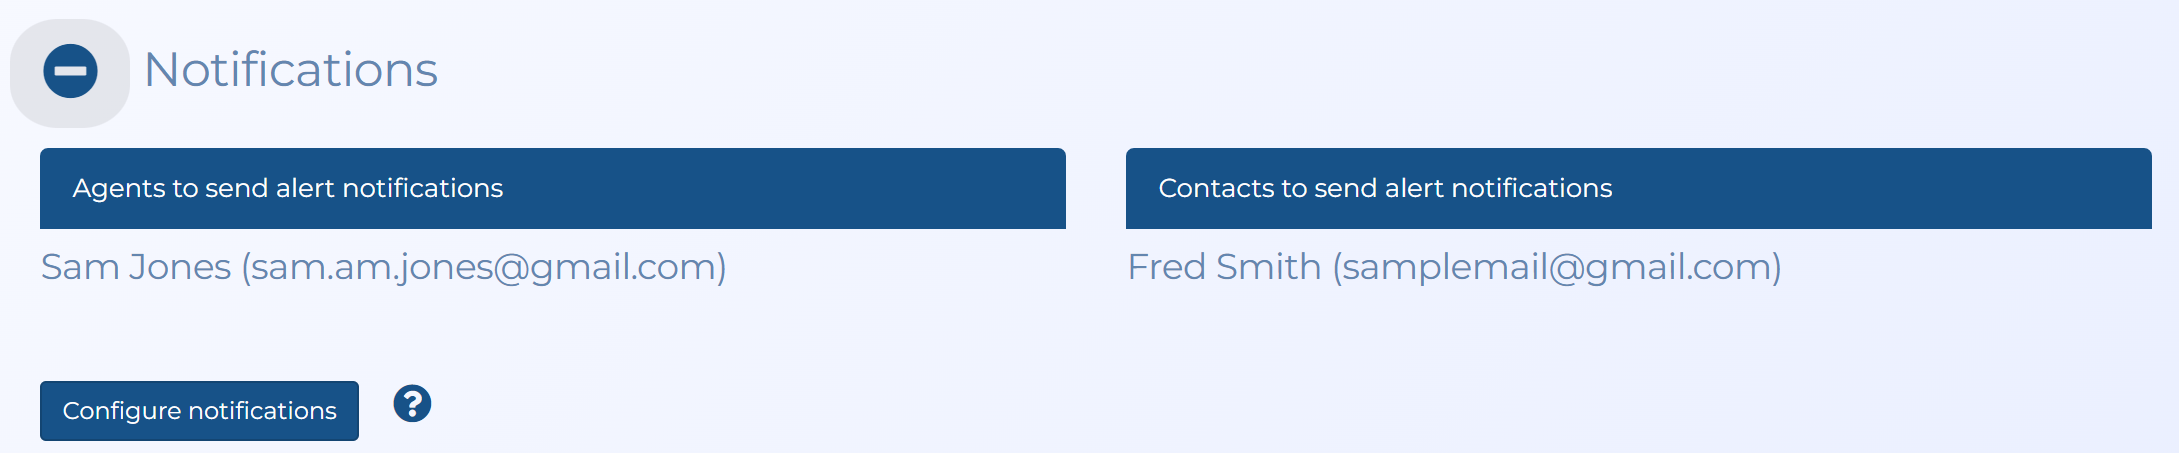
The names you selected now display in Notifications.
NOTE: If you have configured your Smart Track notifications but not receiving them refer to Smart Track notifications your OSS-ESPA is supporting the G-Scout App or the OSS-SRN Express Portal, then the user's domain or the individual user's email must be authorized for access by an administrator. For further information refer to What to do if you are not receiving Smart Track notifications.
Ensure that your contact details display correctly for the alert. Verify your name is displayed in the Notifications section.
Ensure that both Alert enabled and Send notifications are selected. Alert enabled ensures the alert is active and Send notifications ensures that notifications are automatically sent.
Ensure that your alert is configured correctly. Note, the high accuracy alert that is automatically created when you enable Smart Track is set with a minimum accuracy of 200 meters. This means that any GPS ping with a radius greater than 200 meters does not generate a Smart Track notification. If you want to receive notification even if the Smart Track alert parameters are not met, select Forward messages when no alert is triggered.
Ensure Smart Track is active. If not, click it then select Enable location monitoring (Smart Track). Note, this setting is automatically disabled if there is no data for 15 days. If this occurs then you receive email notification.
Ensure Court order expiration date/time has not expired as this date ends the Smart Track monitoring.
On the Manage case screen screen, in the Smart Track alerts & notifications section, verify when the last alert occurred.
On the Smart Track alerts & notifications screen, verify that all the notification related settings for the alert are set as you intended. These notification settings are displayed in Alert details, to the right of each alert.
Verify that your OSS-ESPA account is receiving emails from the operator. If you are using a Gladiator email address, your administrator can verify this and also verify that the emails contain location data.
Verify with your IT department that @gf-le.org and @espa-gf.com are whitelisted.
email notification: the contents of an email notification vary depending on the alert type, for example a multi-phone proximity alert email may include the alert name, alert type, case name, file number, source, the list of the person names that triggered the alert, person details, person images, person hyperlinks, mobile number, operator, vehicle details, vehicle images, the date/time, timezone, latitude, longitude and accuracy.
It also includes a link to open the Real time smart track location screen with the map zoomed on the location of the phones which are marked with icons and circles displaying the location accuracies, and also the alert meeting area.
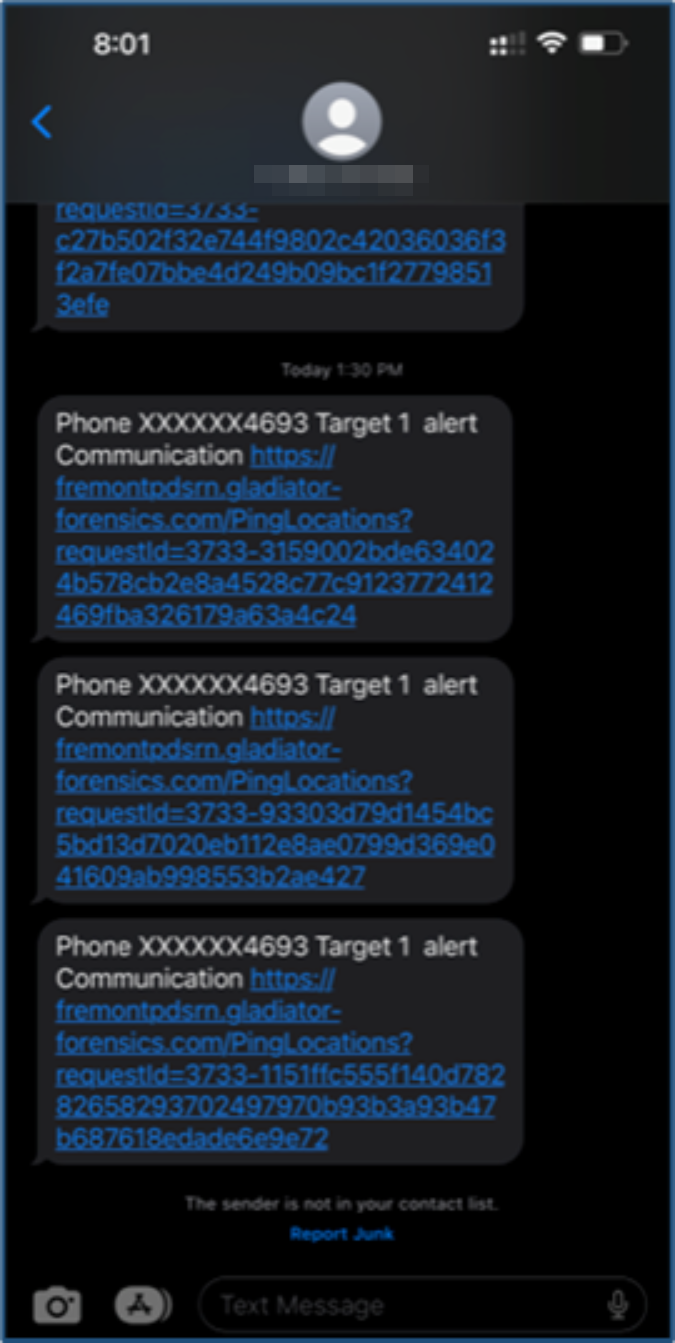
SMS notification: the contents of an SMS notification are much shorter than that of an email and like the email notification it contains a link that allows you to view the notification details on the Real time smart track location screen.
voice call: a voice call details the target name and the alert type and refers you to your email for further details.
What pen register data can trigger a Smart Track alert?
A Smart Track alert can be triggered from a pen register when there is voice, SMS or MMS activity. Network activity such as data, publish, notify, subscribe, register and report are not supported.
the geo-fence alert, which is based on the phone or vehicle being within a defined area. This allows you to monitor if a person is entering a specific location, perhaps the region around the home of a person they are legally not allowed to approach. This alert uses GPS ping, LPR and PRTT data.
the reverse geo-fence alert, which is based on the phone or vehicle being outside a defined area. This allows you to monitor if a person is leaving a specific location, perhaps the region around their home which they are legally not allowed to leave.
the multi-phone proximity alert, which is based on a group of phone users or vehicles being within a specified distance of each other within a specified time period. This type of alert is useful for example, if you are monitoring gang meetings.
the accuracy alert, which is based on the call location being of a high enough accuracy that it would allow you to physically locate the person, therefore it is useful if you are attempting to detain someone.
the phone on/off alerts, which monitor when phones are switched on and off. This type of alert is useful as it may indicate the person did not want their phone location known as they were involved in a crime. This alert is only applicable to AT&T.
the identifier changes alert is based on a phone which you are intercepting changing its subscriber information (IMSI, MSISDN, SUPI-IMSI, GPSI-MSISDN, SUCI, GUTI-5G) and the device information (IMEI, IMEISV, PEI-IMEI, PEI-IMEISV). This type of alert notifies you of pertinent changes related to the target device which may require you to reconfigure other equipment in order to accomplish your mission. This alert uses PRTT data.
the phone communication alert, which is based on:
a phone which you are intercepting communicating with either:
specific phones that you define. This type of alert is useful as it alerts you of communications between people that are specifically of interest to you.
all communications, either SMS, voice or both. This type of alert is useful as it alerts you to all of the person's communications.
communication between the selected target, and a number with either a specific: global identifier type, global identifier category, area code or country code.
This alert uses PRTT data.
the new phone communication alert, which is based on a phone which you are intercepting communicating with a phone that it previously had no communication with. This type of alert is useful as it alerts you to new people who may be of interest to you. This alert uses PRTT data.
the location change alert allows you to monitor when a device has moved by a distance you specify. This alert uses GPS ping and PRTT data.
the no new data alert allows you to configure a notification to be sent when no new GPS ping or PRTT data is received within a defined period of time.
the IP based alerts, which are based on monitoring specific IP addresses and monitoring if the target's IP address changes.
the Roaming Registration (In/Out Country) alert allows you to monitor when a target's device connects to a network outside of the US.
the WiFi network alert allows you to monitor when a target's device connects to a WiFi network.
Click here for a short video showing the different types of Smart Track alerts and notifications.
 Using Smart Track for live location monitoring tracking and alerts
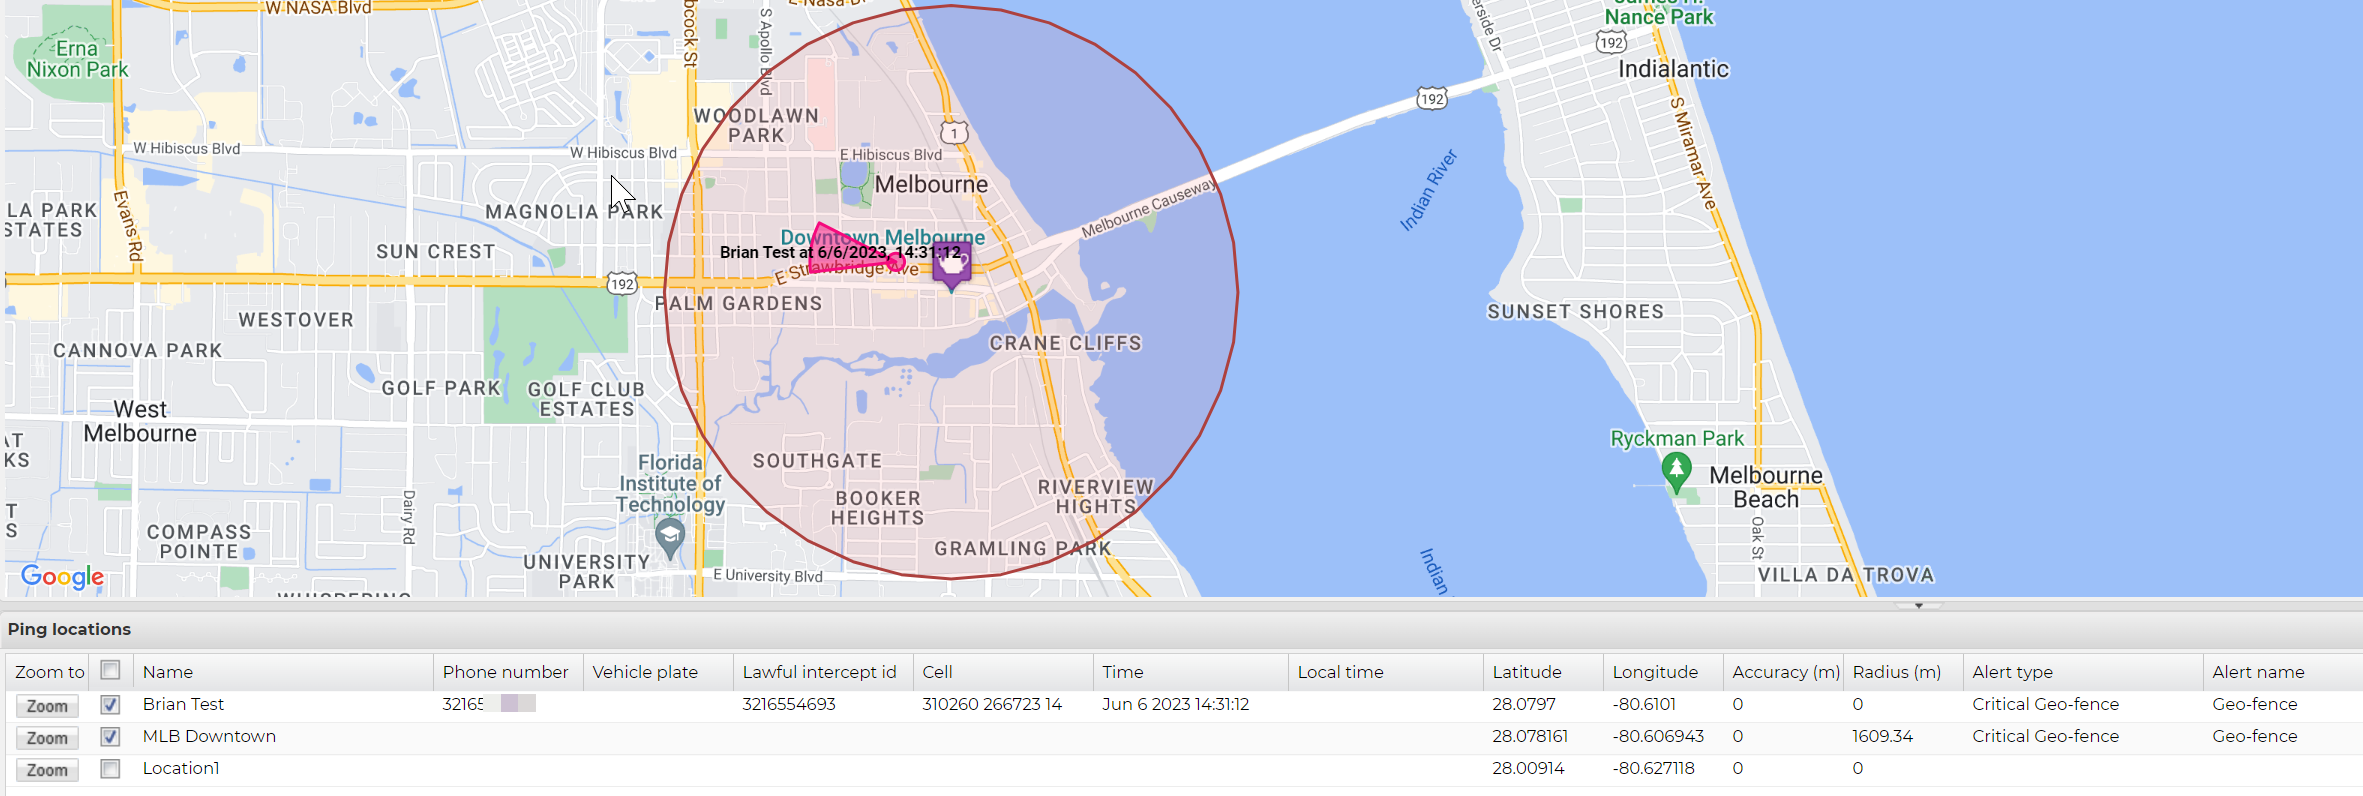


 to open the
  at the top-right of the screen to open either the
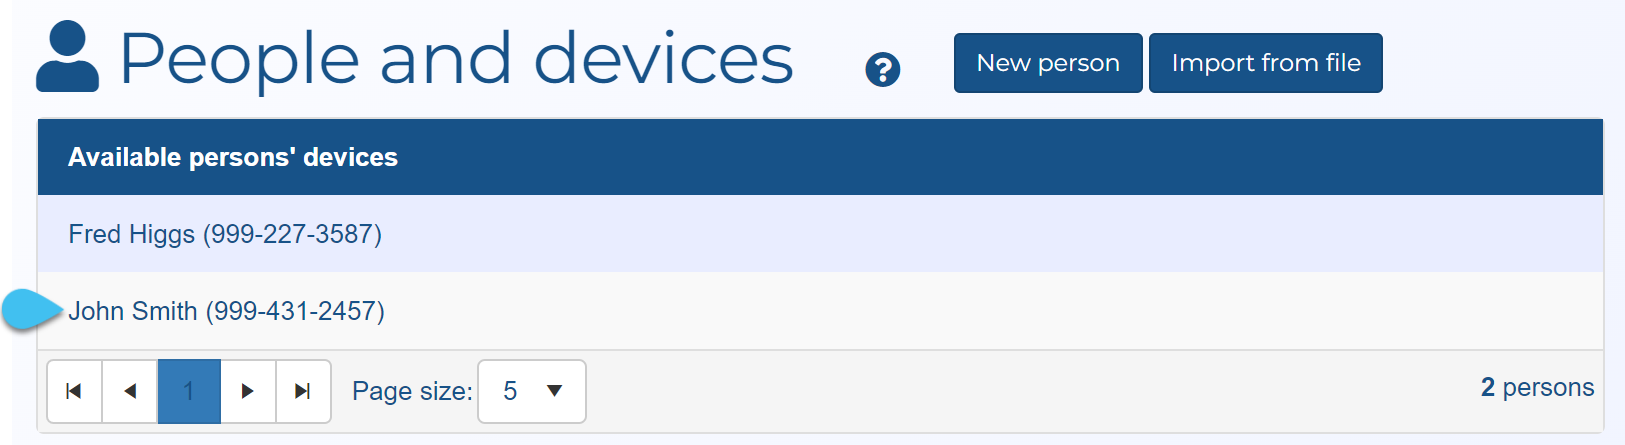


 to display the
 to display the


 beside